
 Loading... Please wait...


- Home
- Help and Info
- Solving Vinyl Graphic Issues
Solving Vinyl Graphic Issues


DAMAGED VINYL WHEN PACKAGE WAS OPENED |
||||||||||||||||||||
|
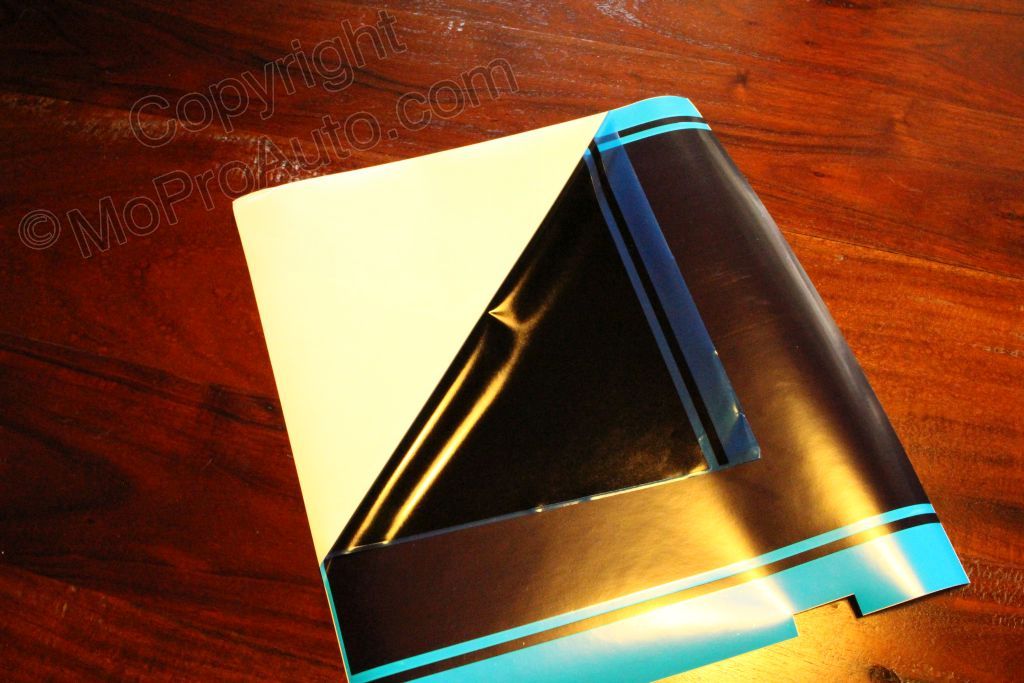
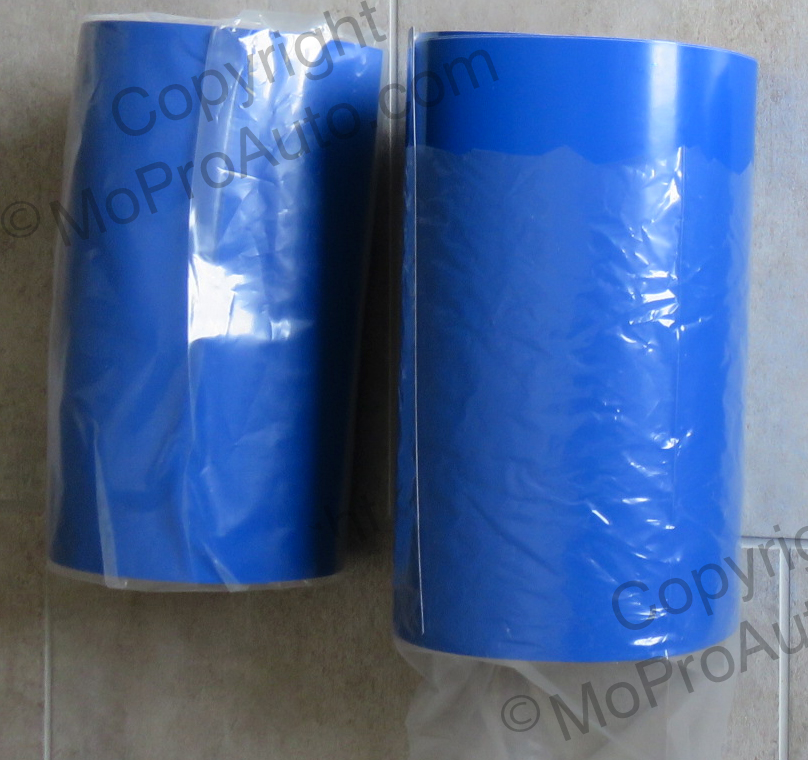
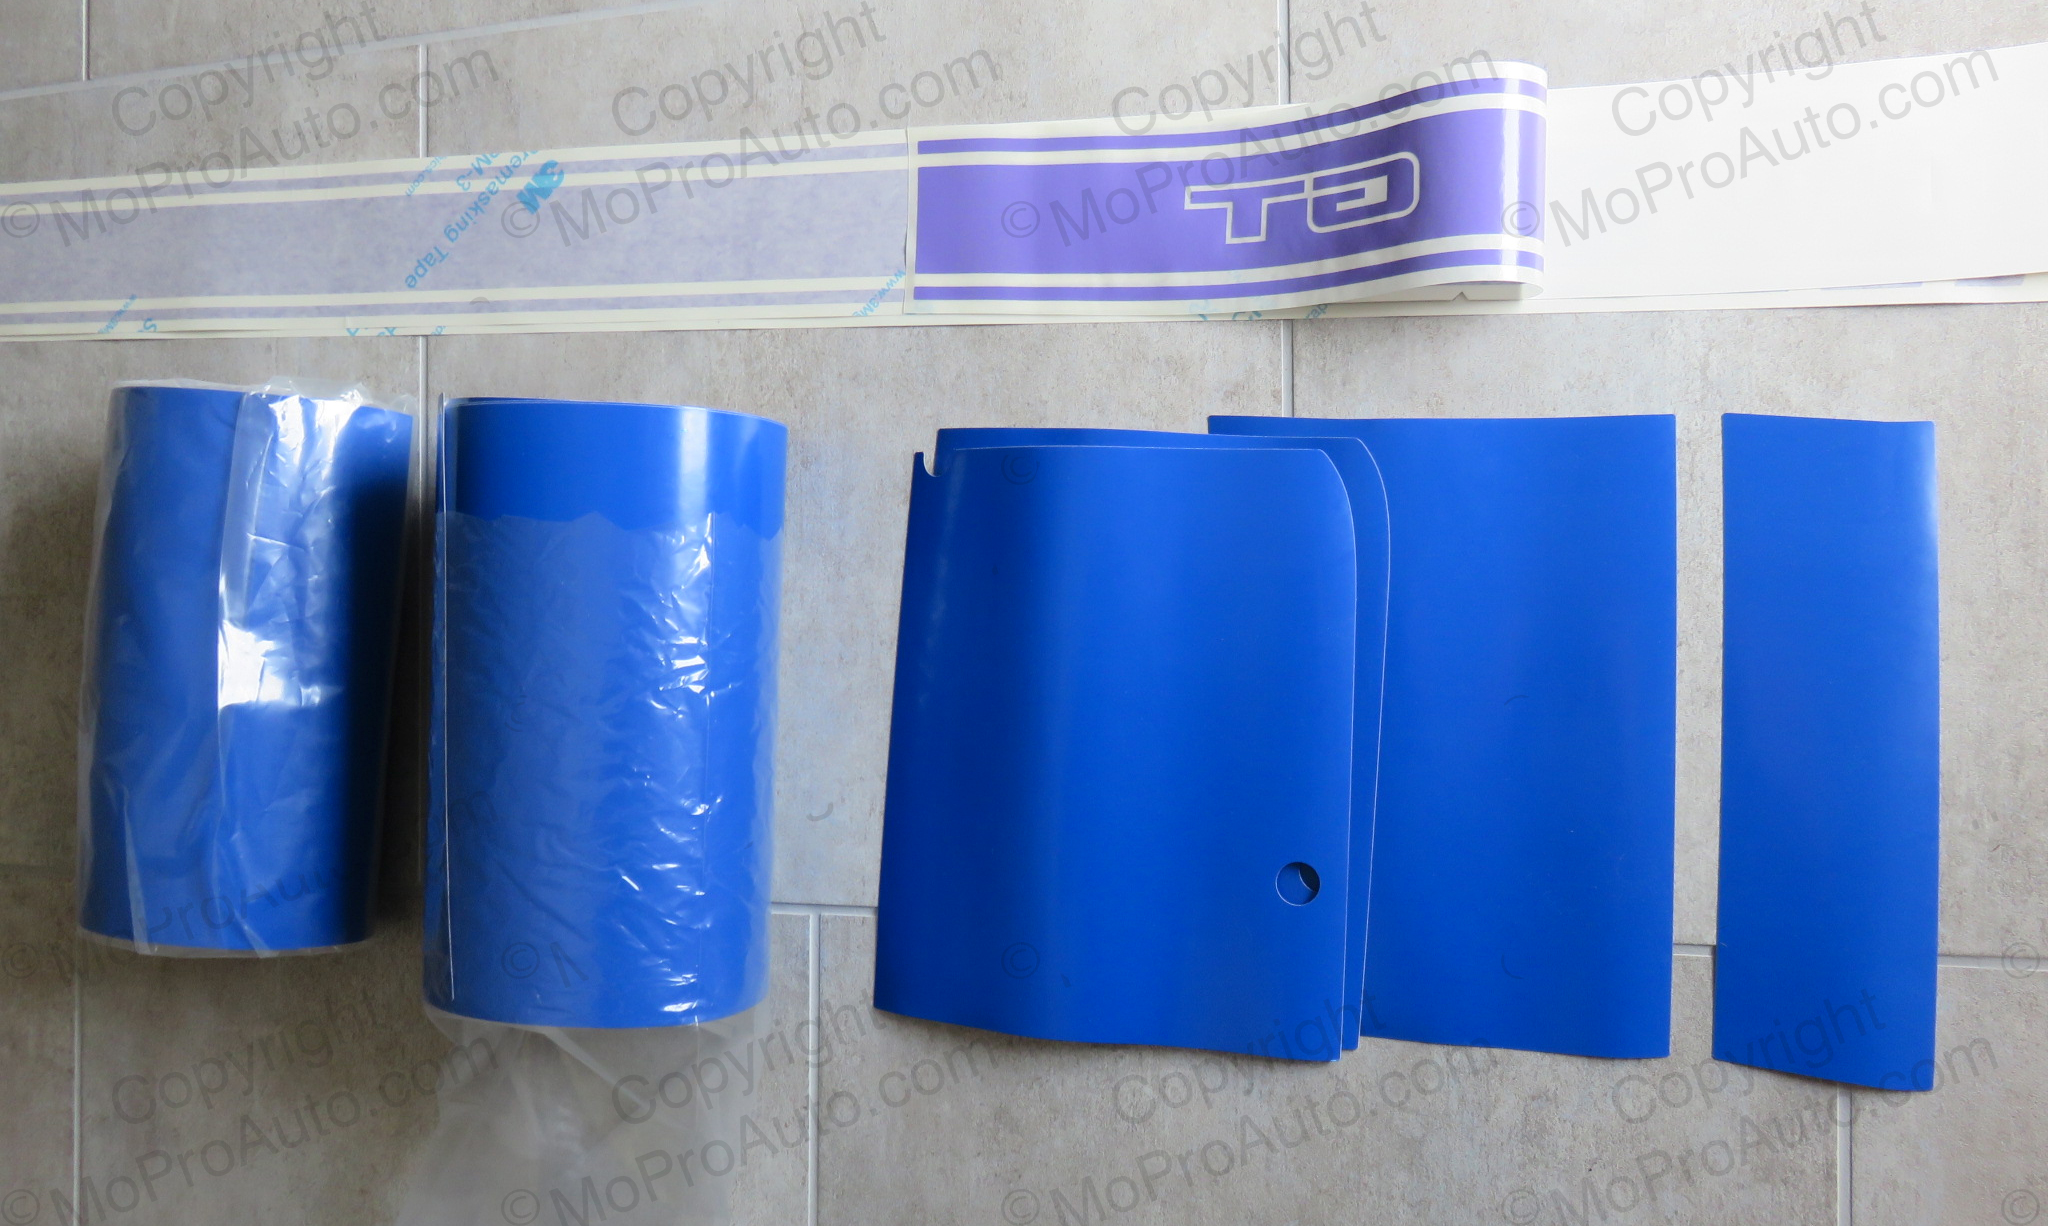
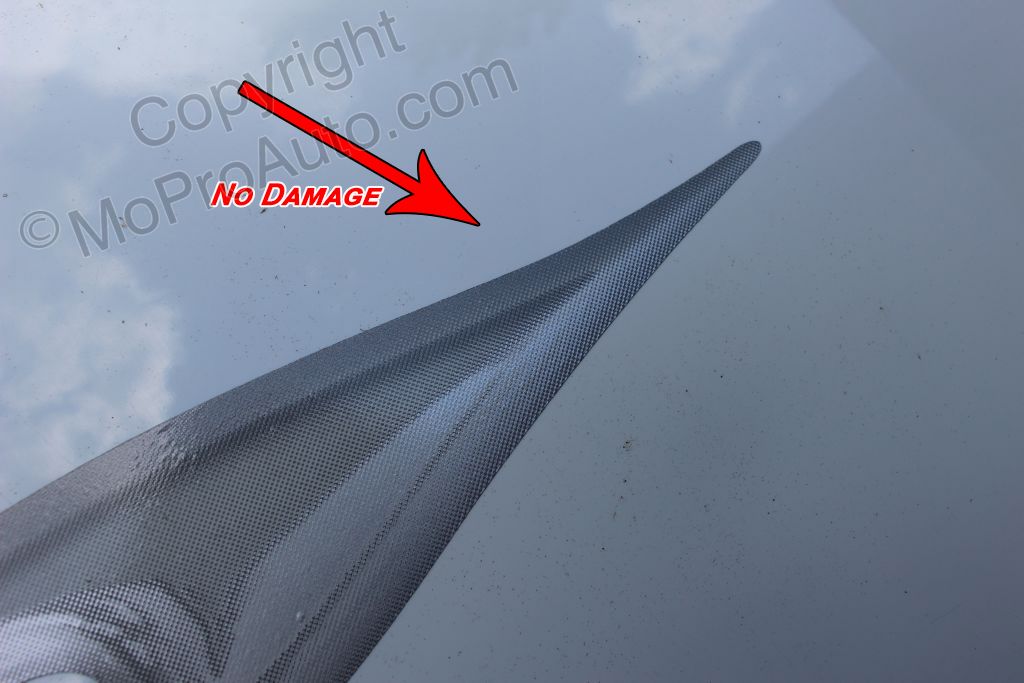
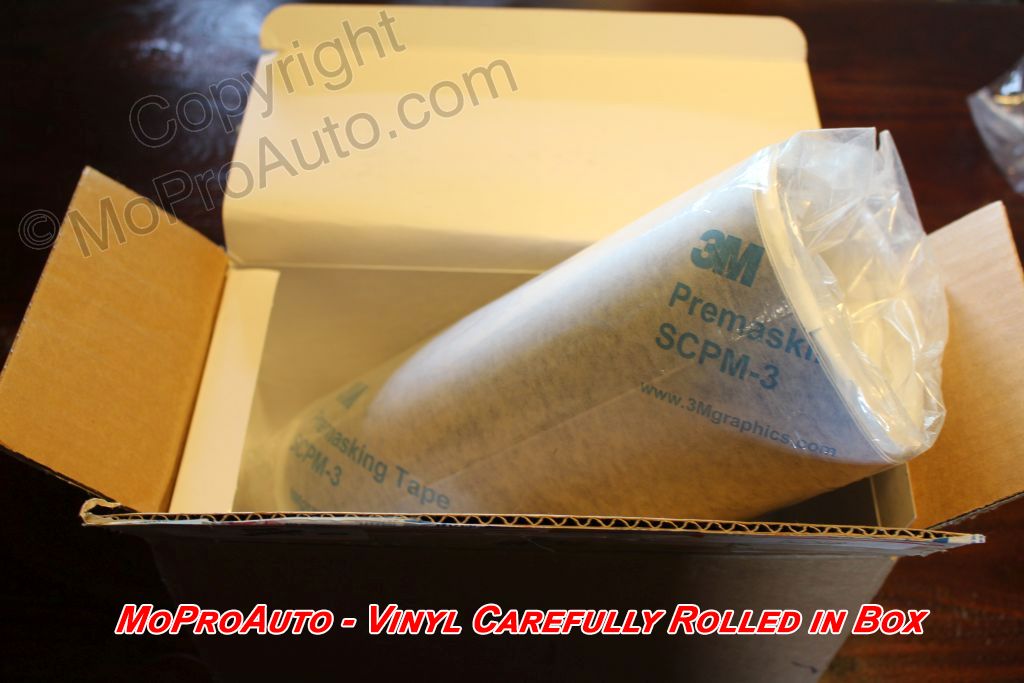
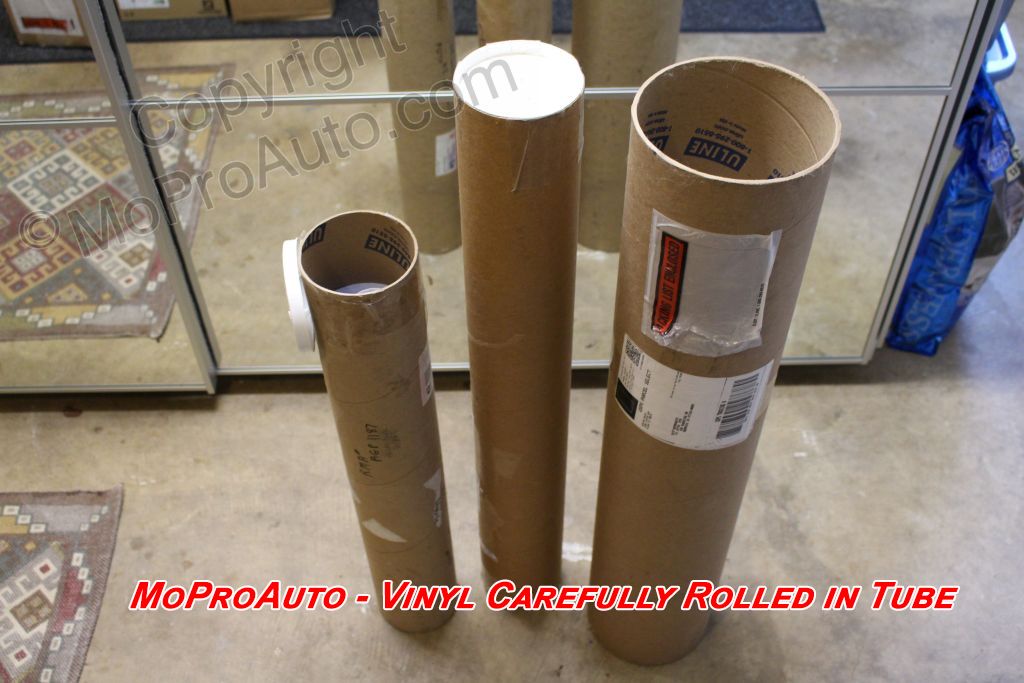
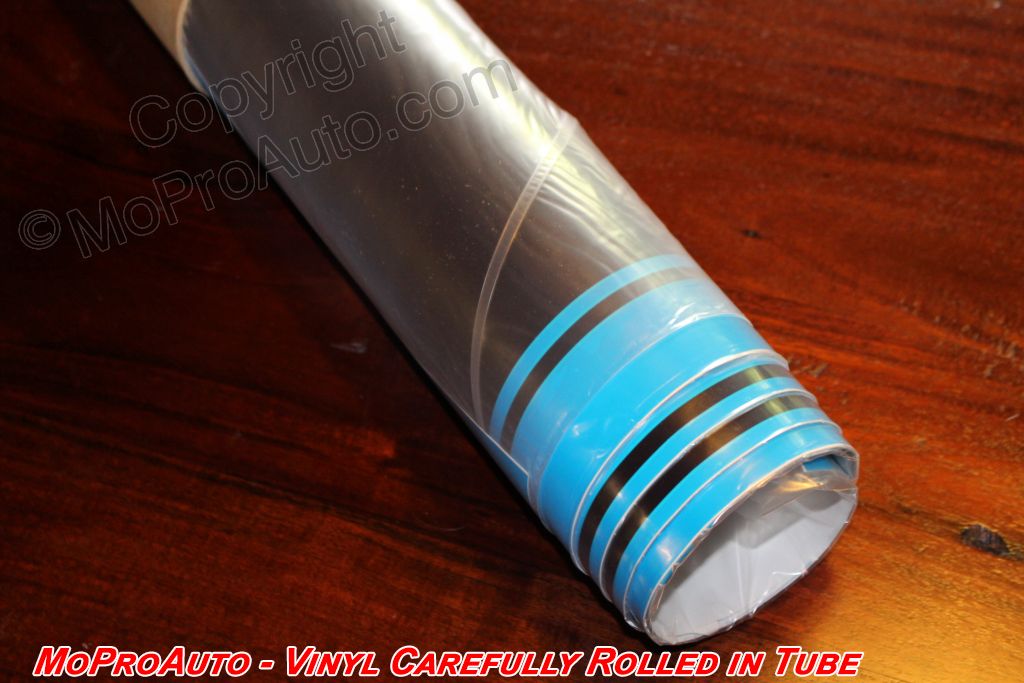
AVOID DAMAGE TO VINYL WHEN REMOVING FROM PACKAGE : After opening box or tube, gently remove the vinyl from the package to avoid twisting or crunching the vinyl. In most cases the vinyl can still be smoothed out on install, however please be careful when removing from package. We pride ourselves on the great care put into packaging these vinyl kits, and any type of damage due to improper packaging is extremely rare. Please see this video for more information on how we package our kits, and how to properly remove from container : MOPROAUTO |*DOES NOT*| SHIP VINYL GRAPHICS IN THIS CONDITION! Damage to the vinyl will occur if not properly removed from container. These examples were sent in by customers who did not carefully remove the vinyl from the package, resulting in a ruined vinyl graphic kit. See the video above on why this will happen. Please understand that these issues void all warranties :
PLEASE EXAMINE VINYL WITH INSTALLER BEFORE INSTALLATION!
|


|
FOLDED CORNER? |
WRINKLED MASK? |
IMPERFECTIONS? |
LUMPS IN MASK? |
LUMPS IN MASK? |
|
NO LUMPS |
NO LUMPS |
FOLDED CORNER? |
AFTER REMOVING |
NO PROBLEM |
|
HOW WE PACKAGE |
HOW WE PACKAGE |
HOW WE PACKAGE |
HOW WE PACKAGE |

BUBBLES or WRINKLES IN VINYL BEFORE / AFTER INSTALLATION |
|
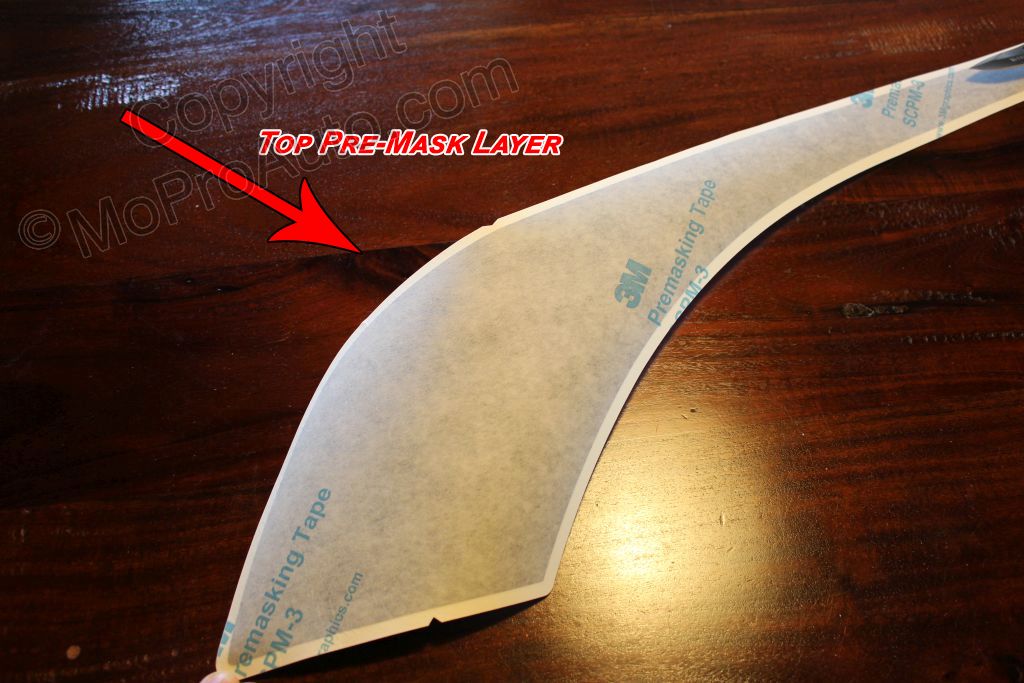
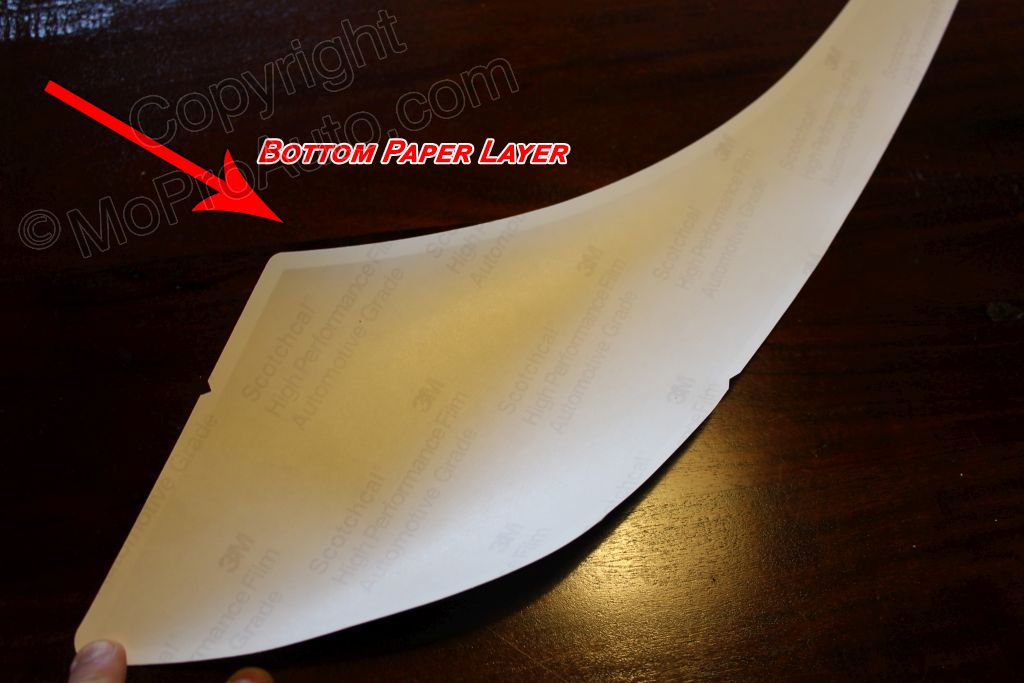
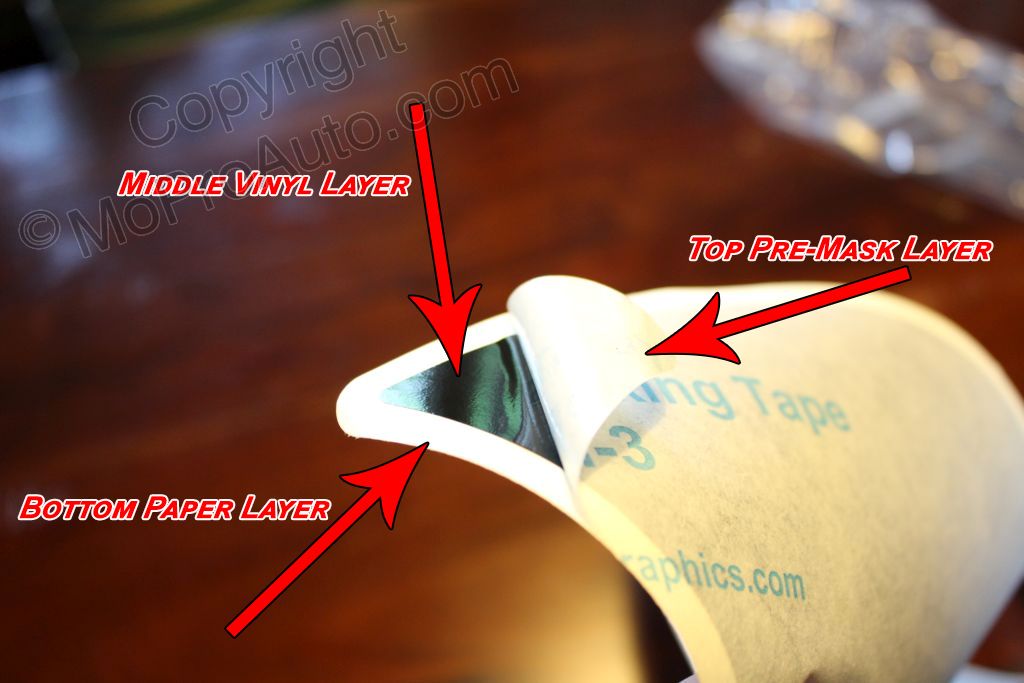
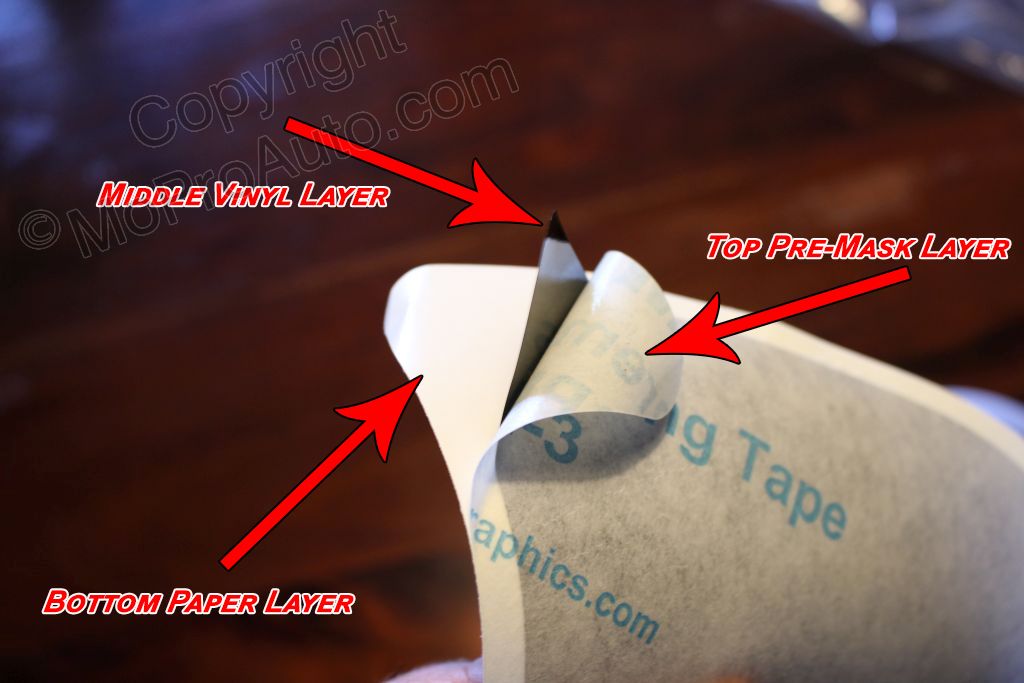
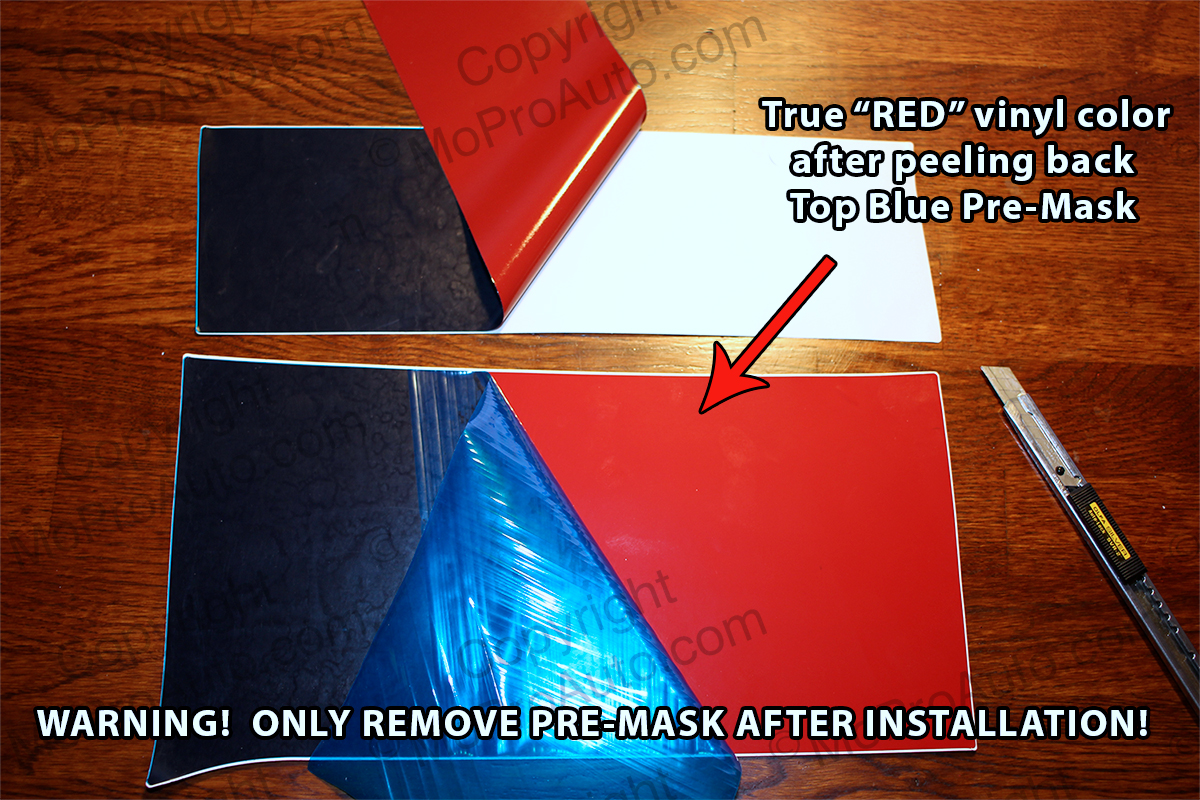
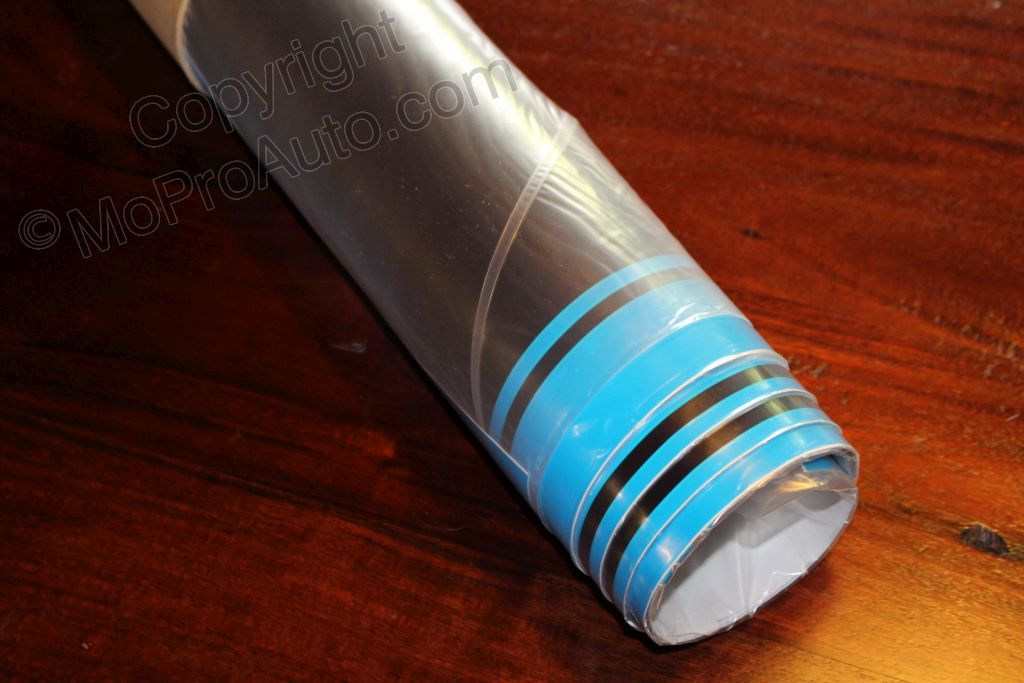
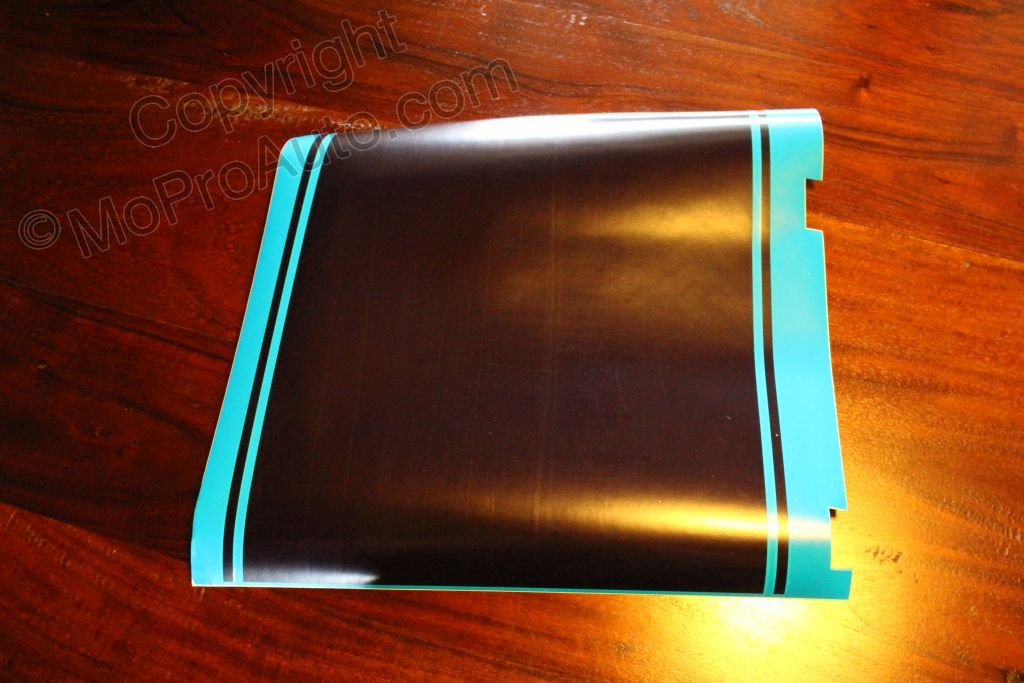
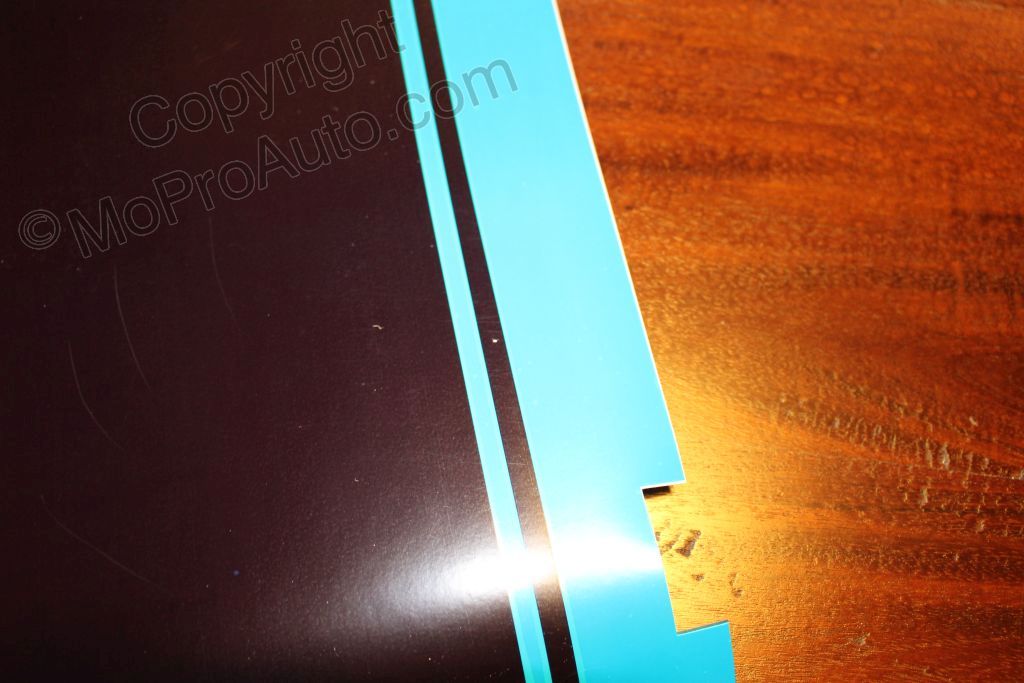
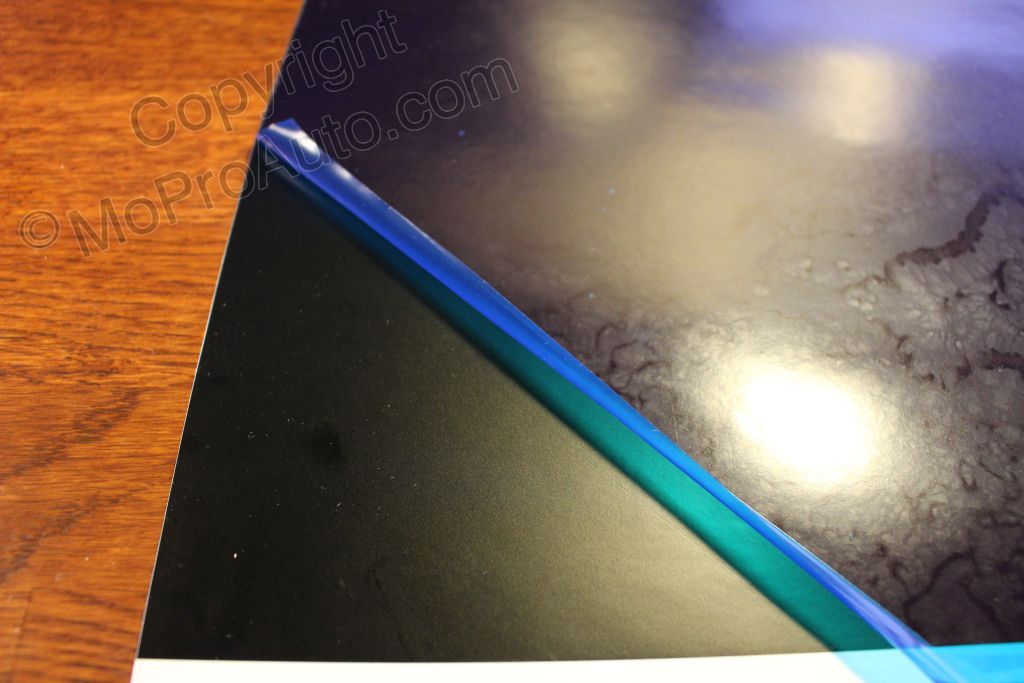
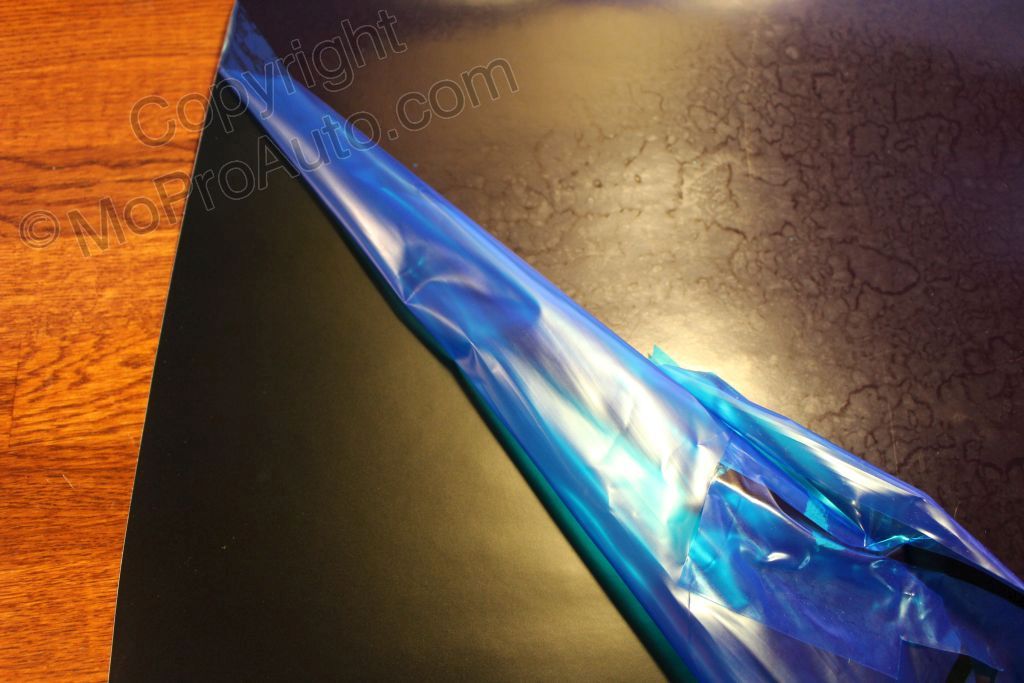
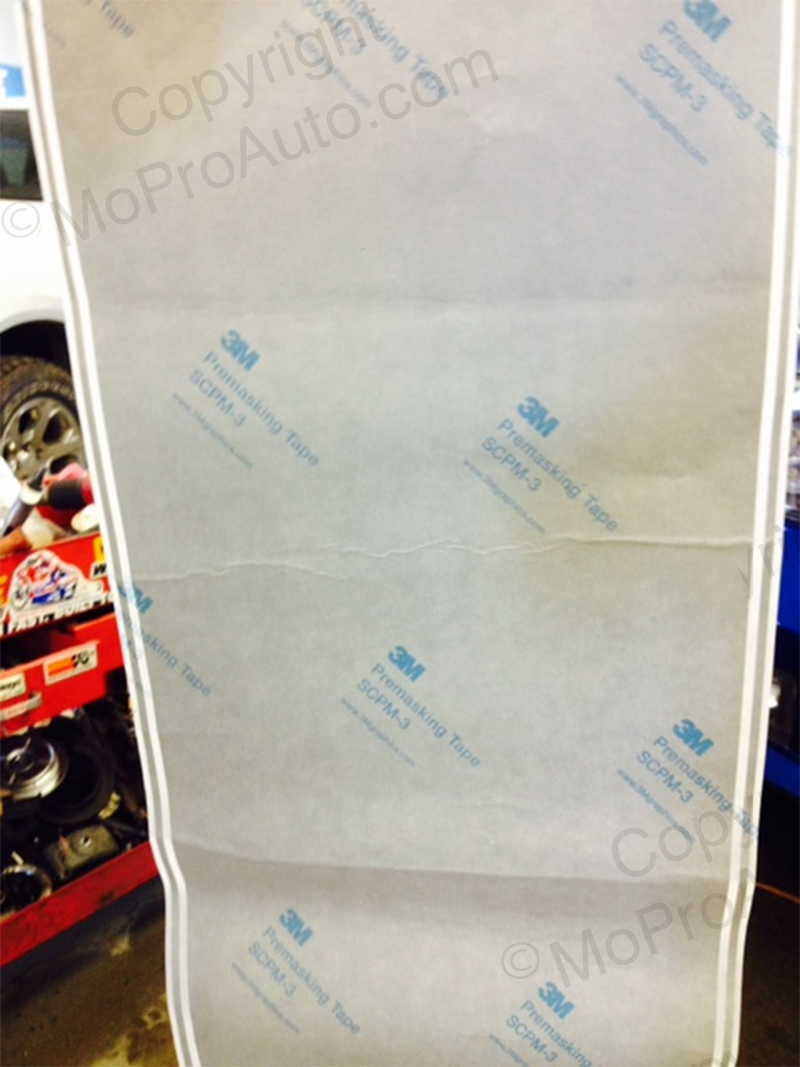
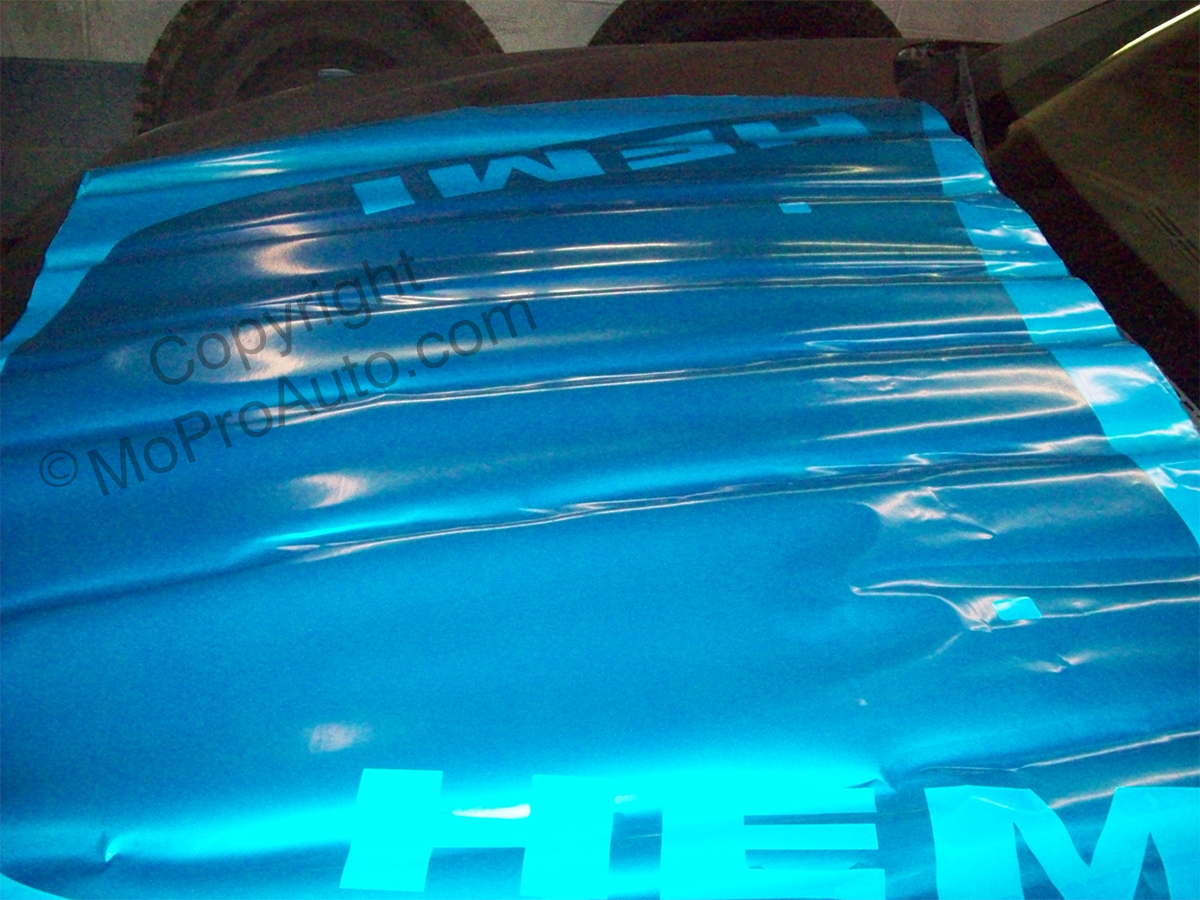
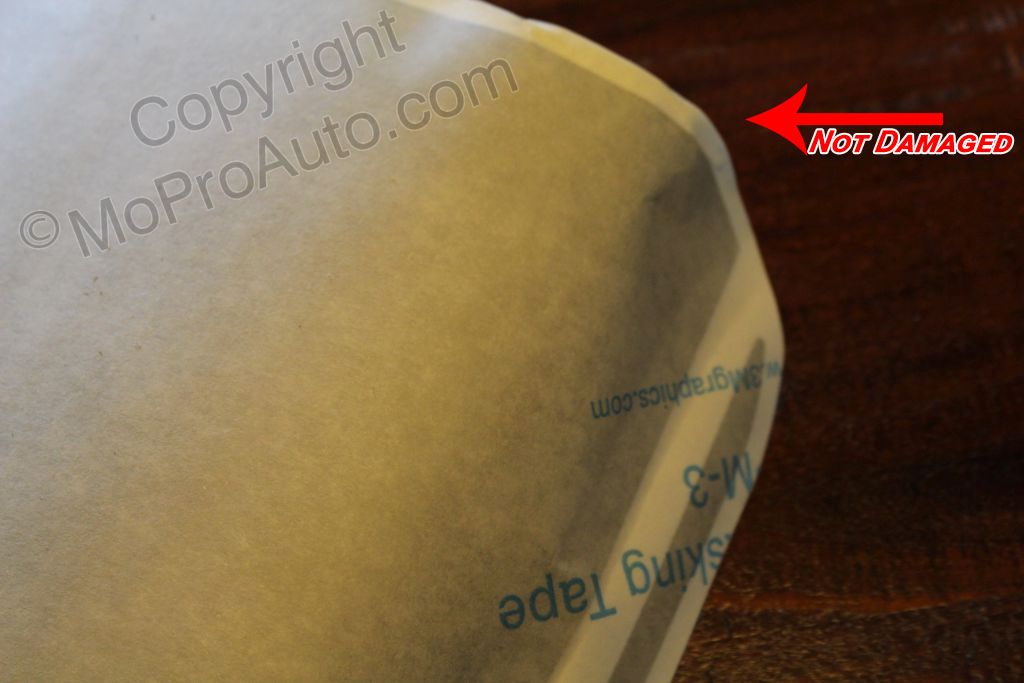
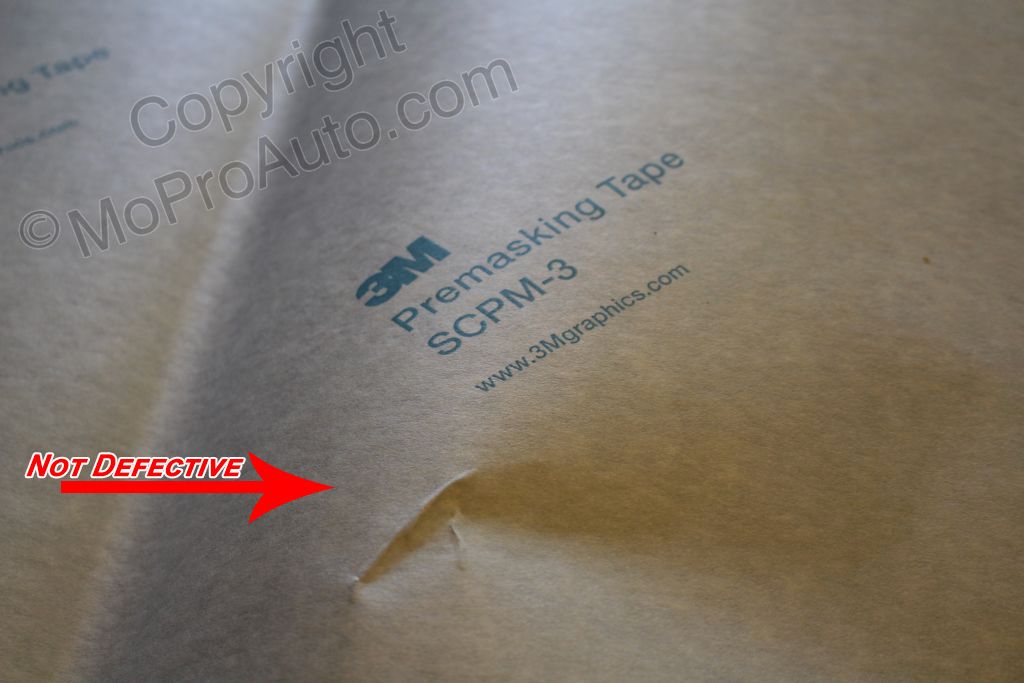
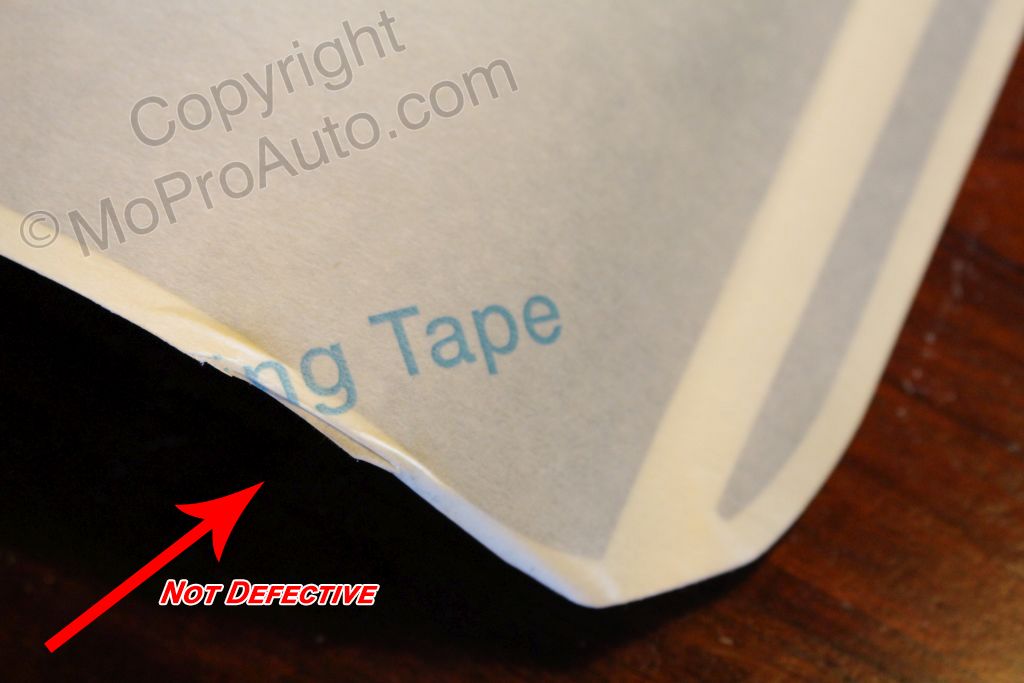
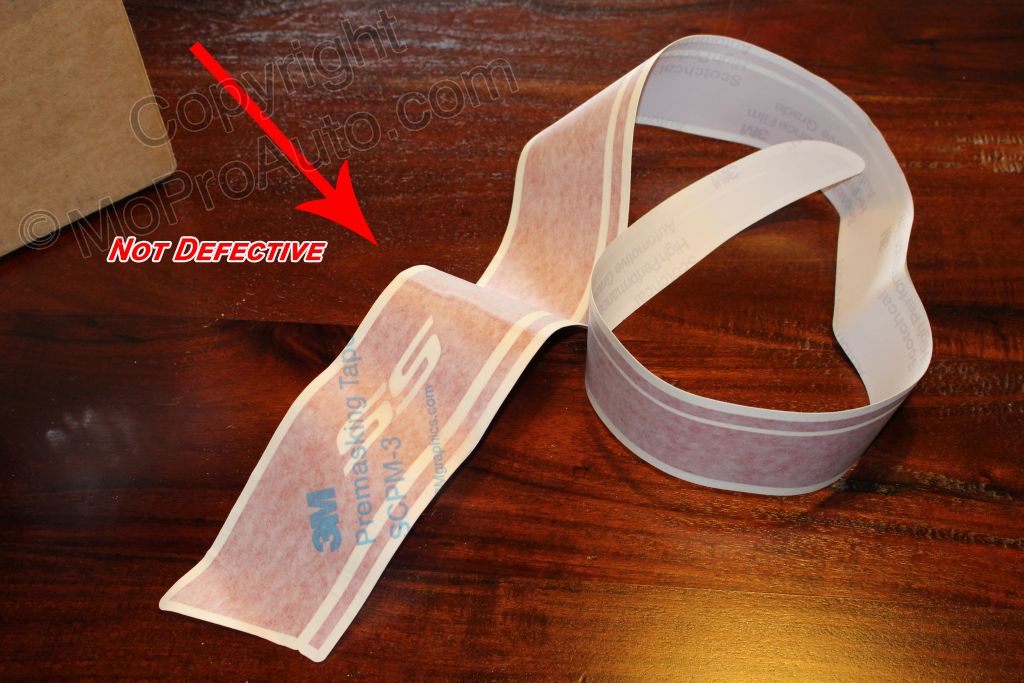
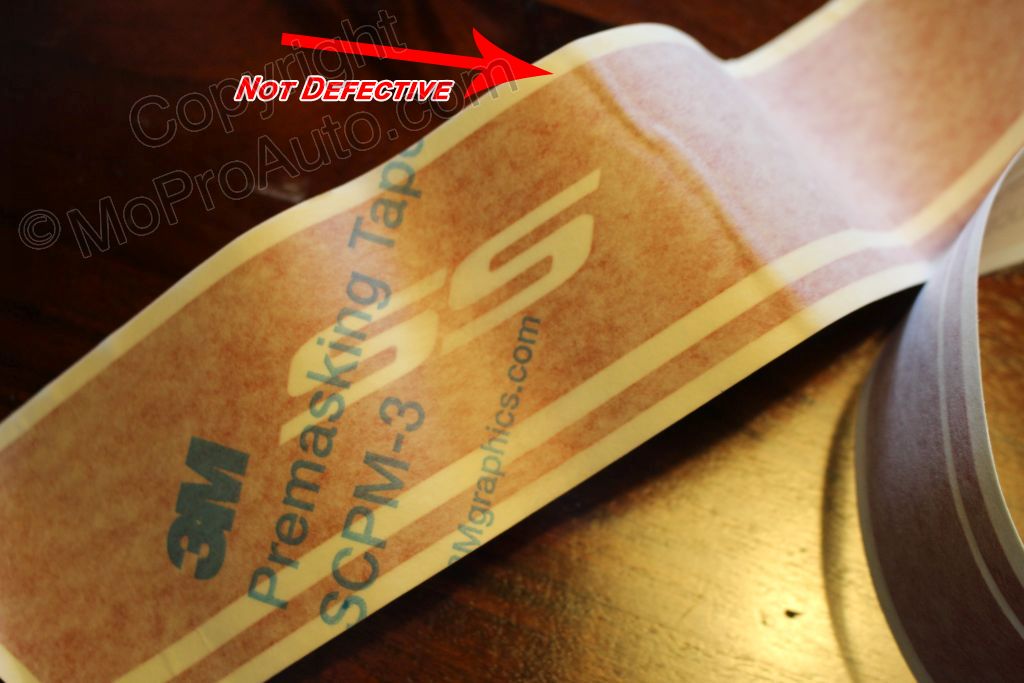
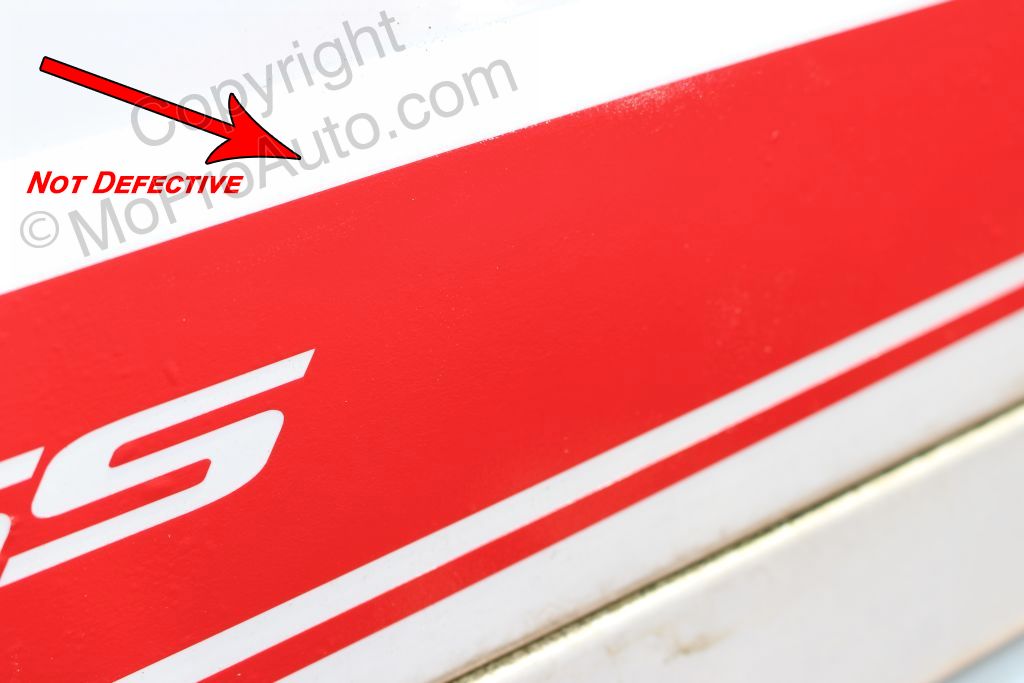
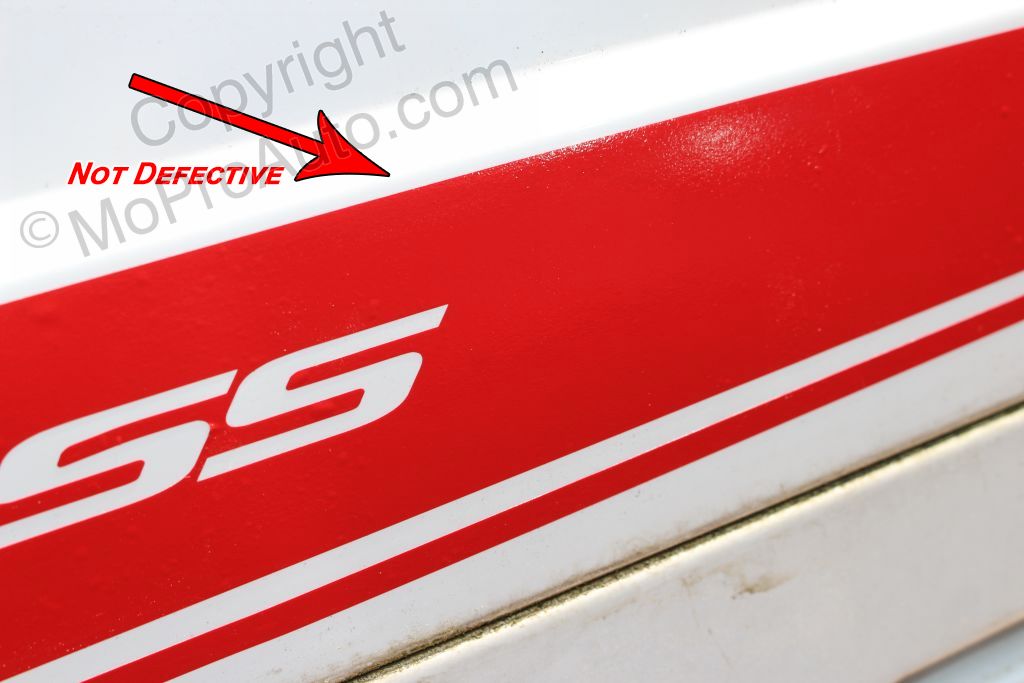
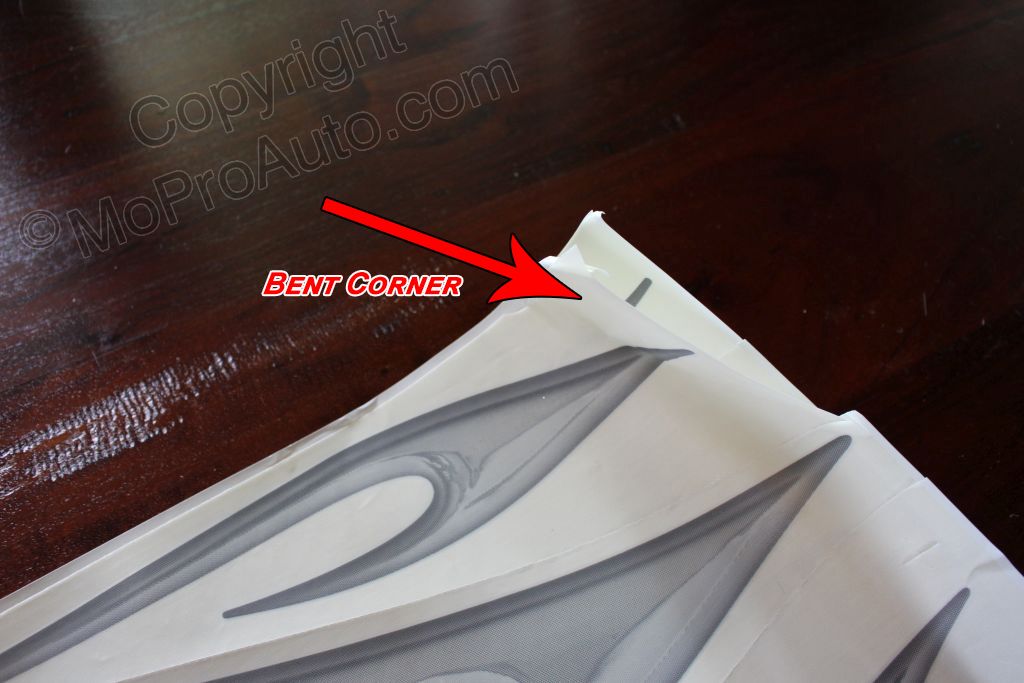
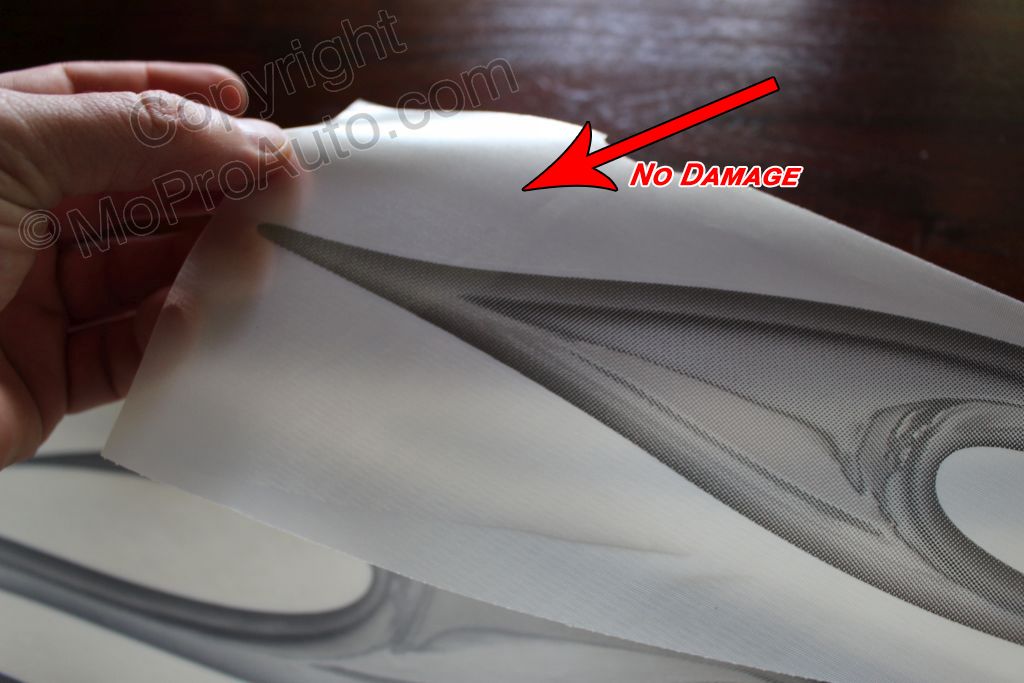
BUBBLES OR WRINKLES BEFORE INSTALLATION : When the kit is unrolled, you may see wrinkles in the top pre-mask layer. Wrinkles in the top pre-mask layer or bent corners is NOT A DEFECT nor damage in the product, and WILL NOT HINDER INSTALLATION. Vinyl is very resilient and the wrinkles will come out during installation. Please keep in mind : * Pre-mask wrinkles may be more prominent once the product is unrolled * Wrinkles will come out after the top pre-mask liner is removed, and you smooth the vinyl graphic out during installation. * Any lumps or wrinkles in the vinyl will become permanent if squeegeed too firmly and quickly during installation, so be careful! * For more information, please see the above pictures. If you feel there will be a problem, STOP INSTALLATION IMMEDIATELY and take pictures of the vinyl to show us the issue. We require pictures BEFORE installation begins to avoid any mis-understandings about wrinkles or bubbles that can happen due to installer neglect. BEFORE INSTALLATION please email a minimum of three (3) pictures along with details of your order : CONTACT US! BUBBLES OR WRINKLES AFTER INSTALLATION : Wrinkles, bubbles, or other defects in the vinyl after installation is the result of improper squeegeeing of the vinyl during installation. It is the responsibility of the installer to avoid bubbles and/or wrinkles by following the installation instructions closely! Information on how to avoid these situations is in the general installation instructions included with the order. These issues are a result of poor installation skills, is not a defect in the vinyl, and do not fall under any warranty. WAS THE TOP LAYER PRE-MASKING REMOVED? Some customers see bubbles or wrinkles after installation and think there is a problem with the vinyl, but they failed to remove the top layer pre-masking. Please see these two links for more information : https://www.moproauto.com/solving-vinyl-graphic-issues/#L1 https://www.moproauto.com/solving-vinyl-graphic-issues/#L7 PLEASE REMEMBER TO VIEW OUR INSTALLATION VIDEOS for tips on how to avoid bubbles, wrinkles, strectched vinyl, etc., on install at this link : https://www.moproauto.com/installation-links/ WRINKLED/BUBBLED VINYL AFTER INSTALLATION IS THE RESPONSIBILITY OF INSTALLER
|
BACKING PAPER IS STICKING TO VINYL |
||||||||||
|
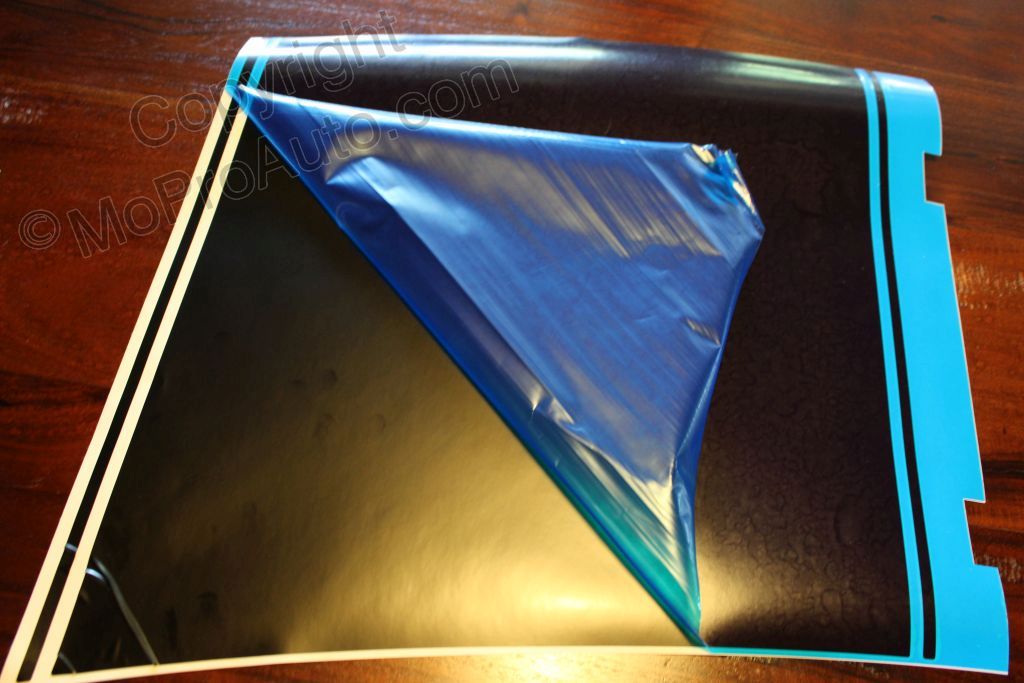
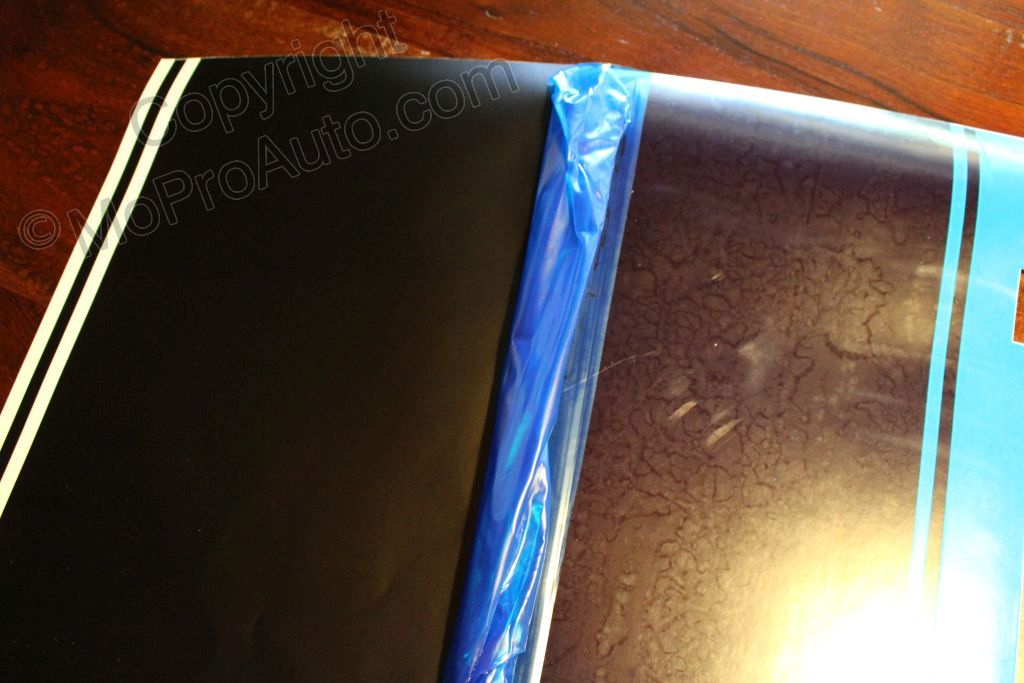
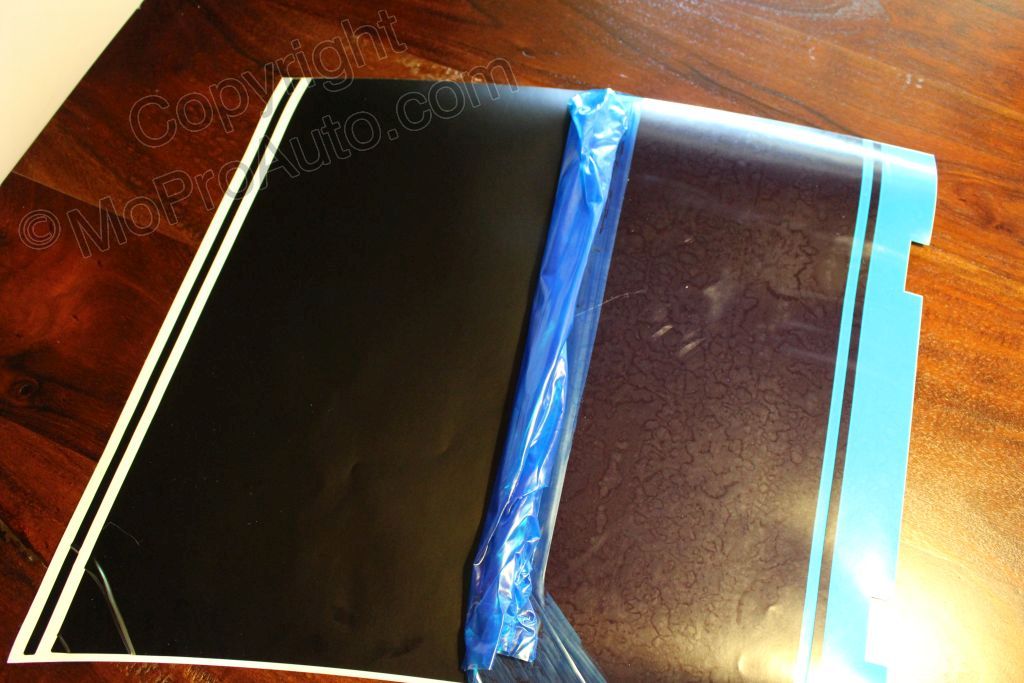
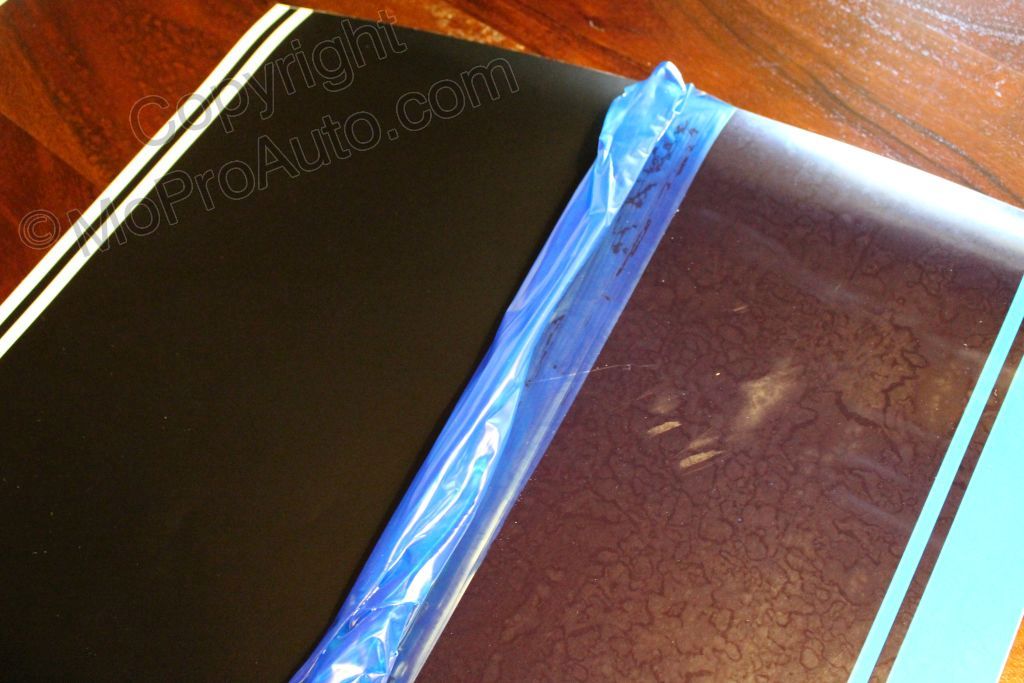
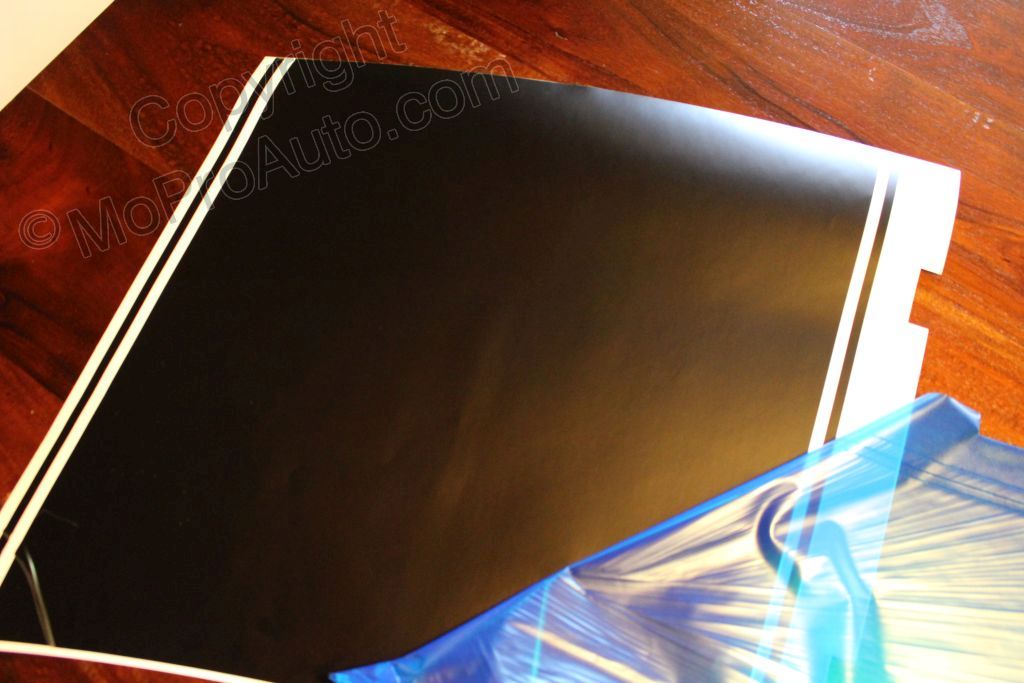
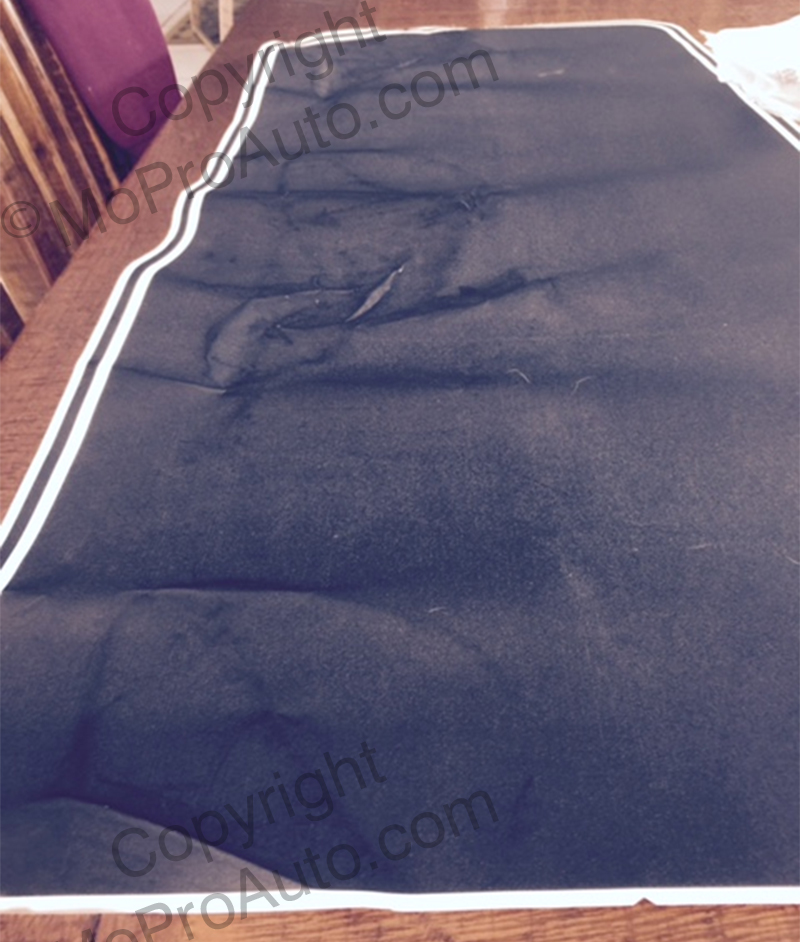
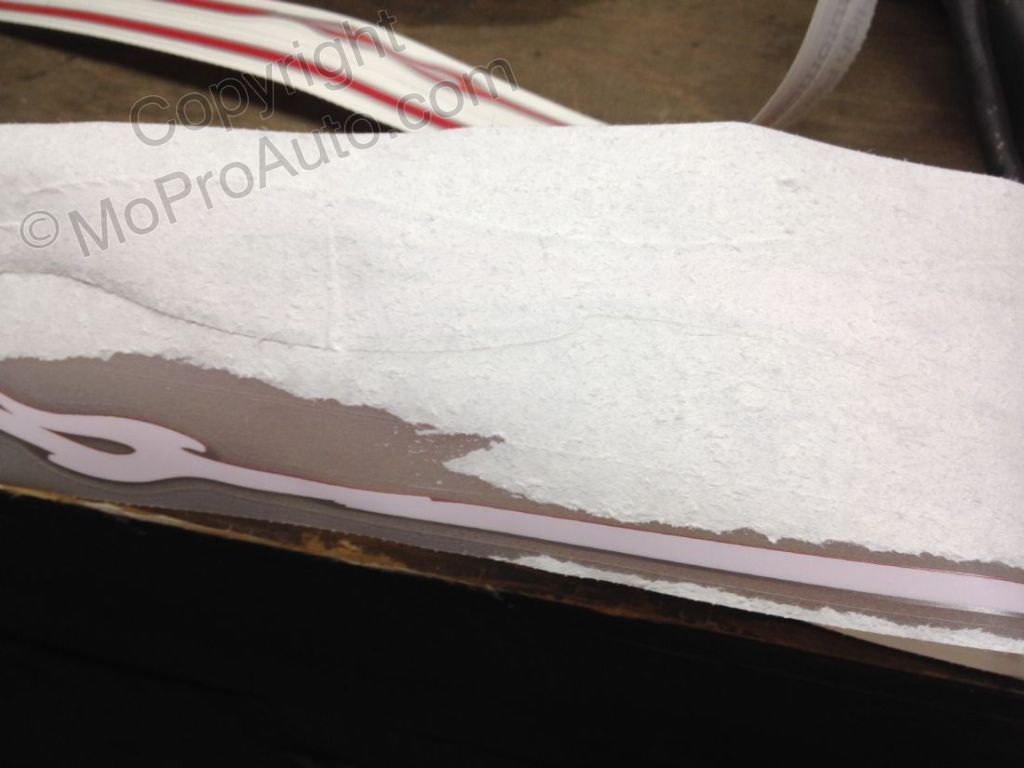
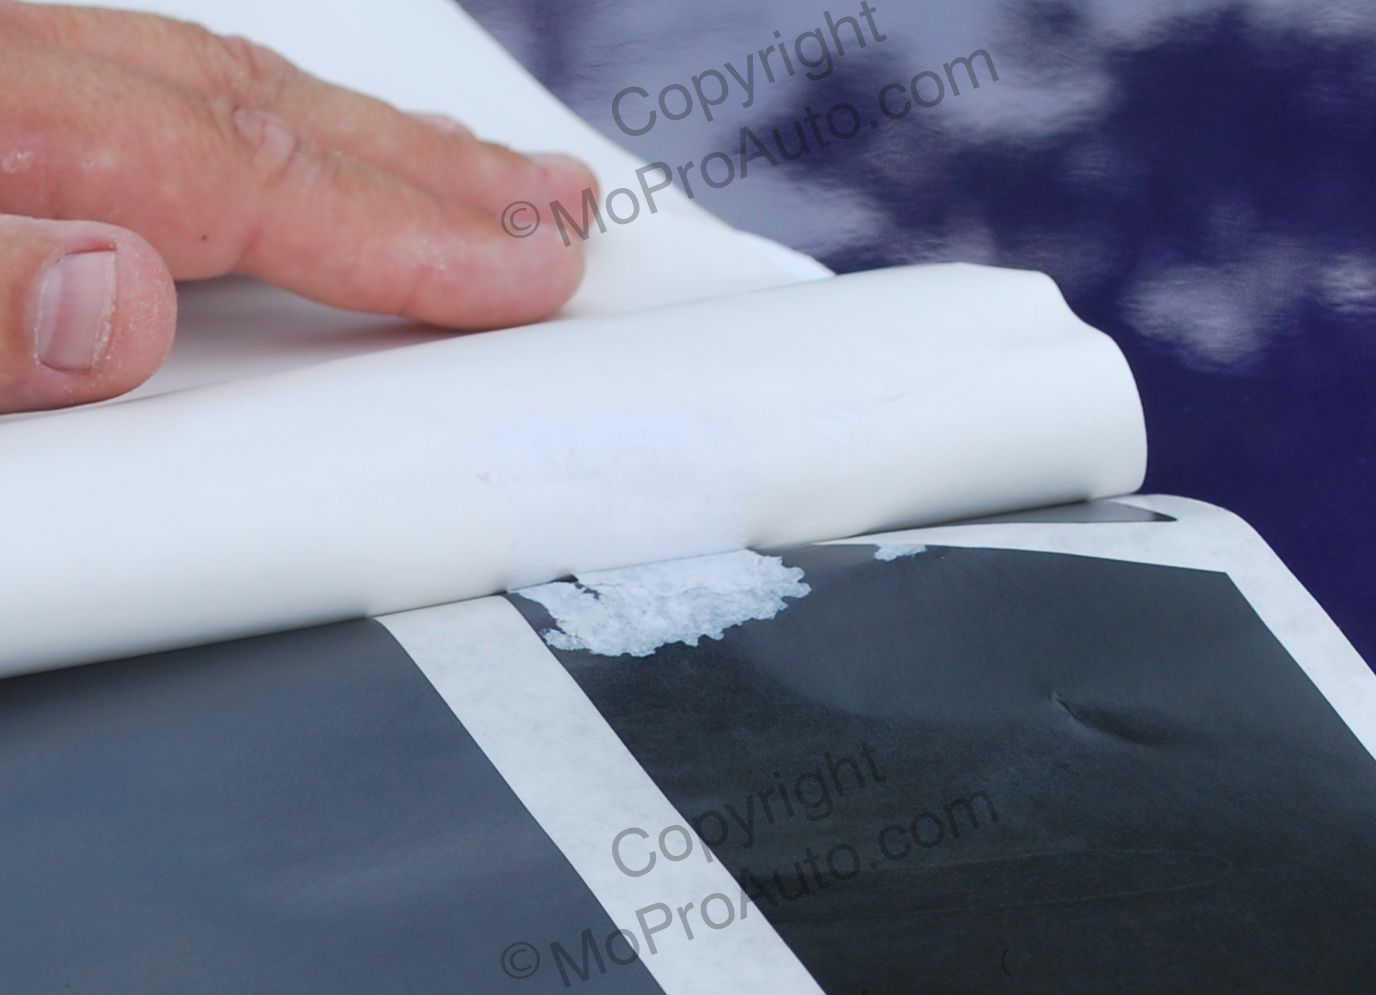
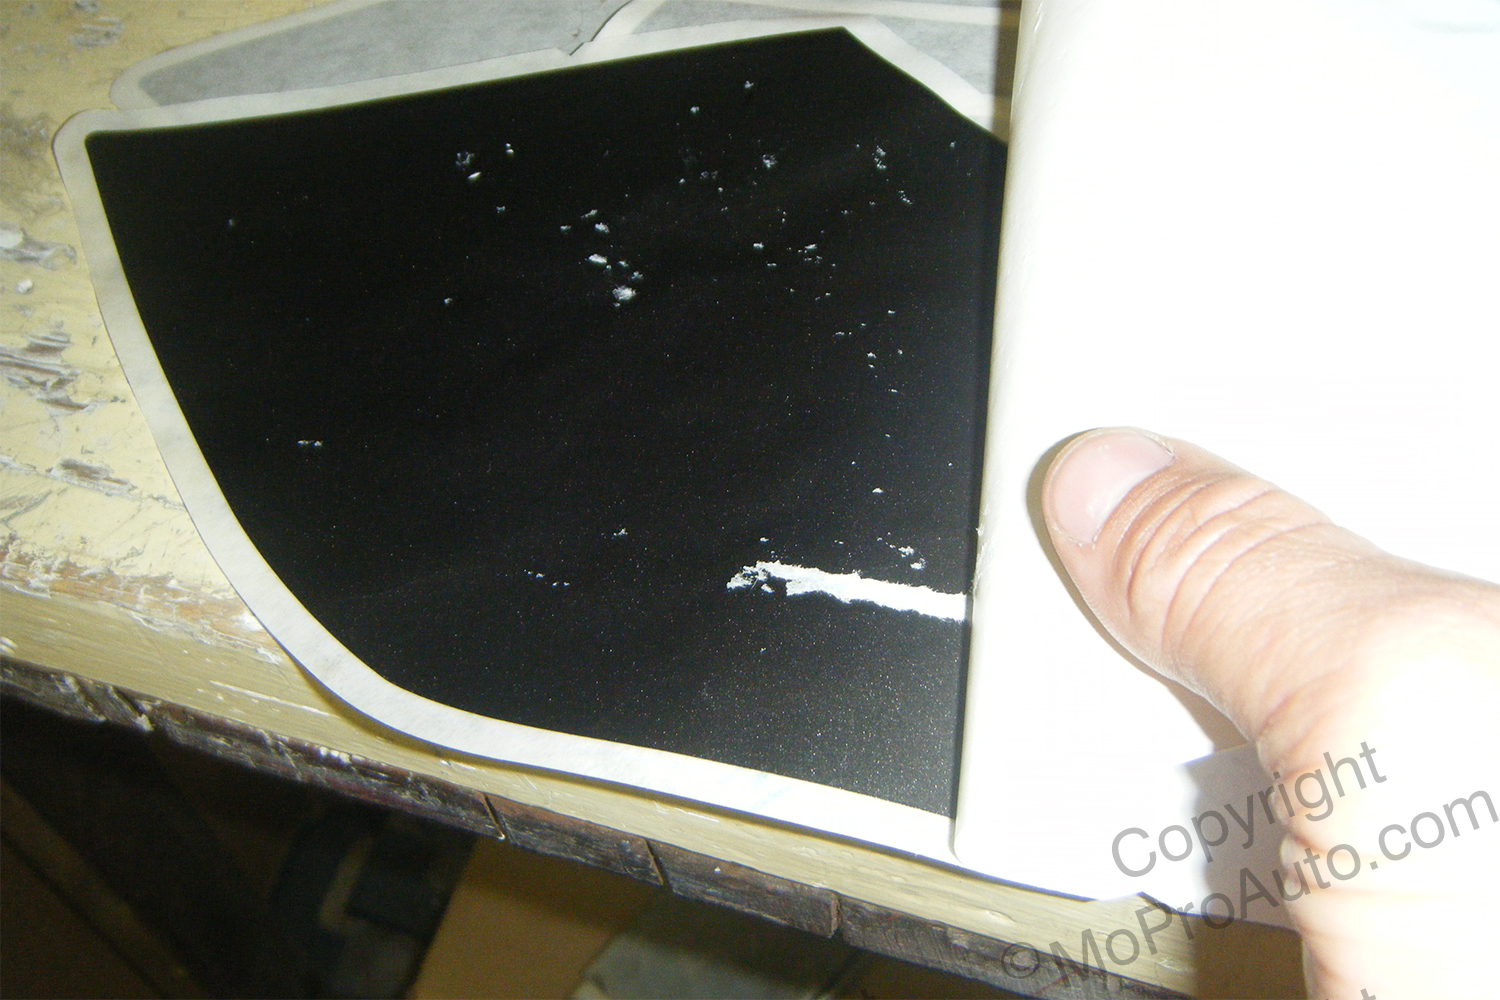
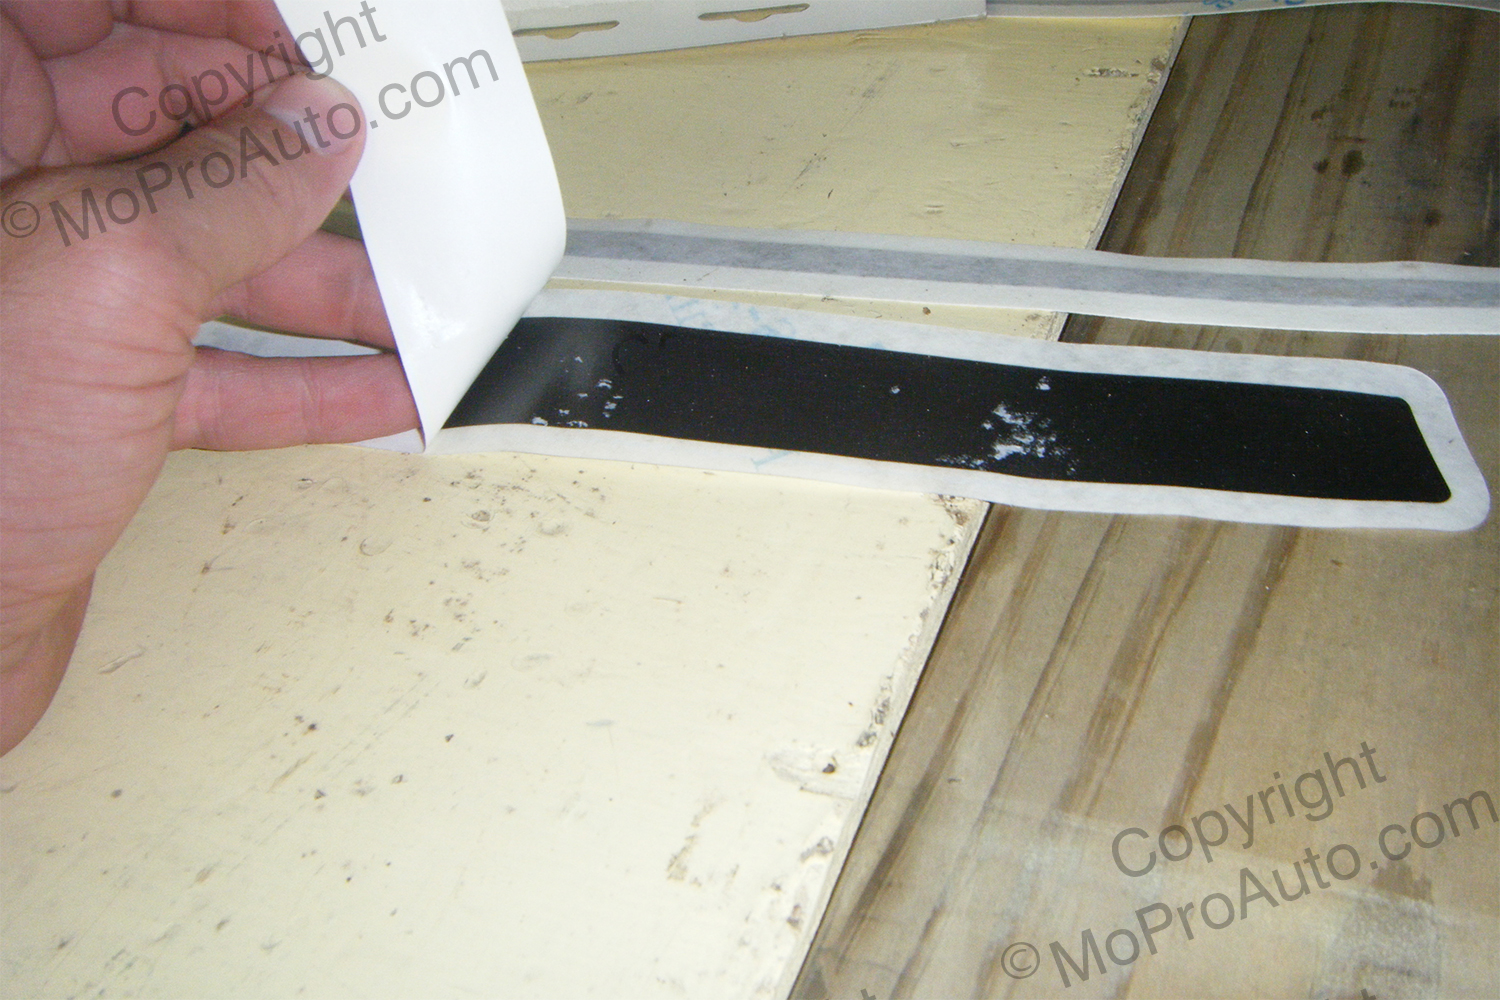
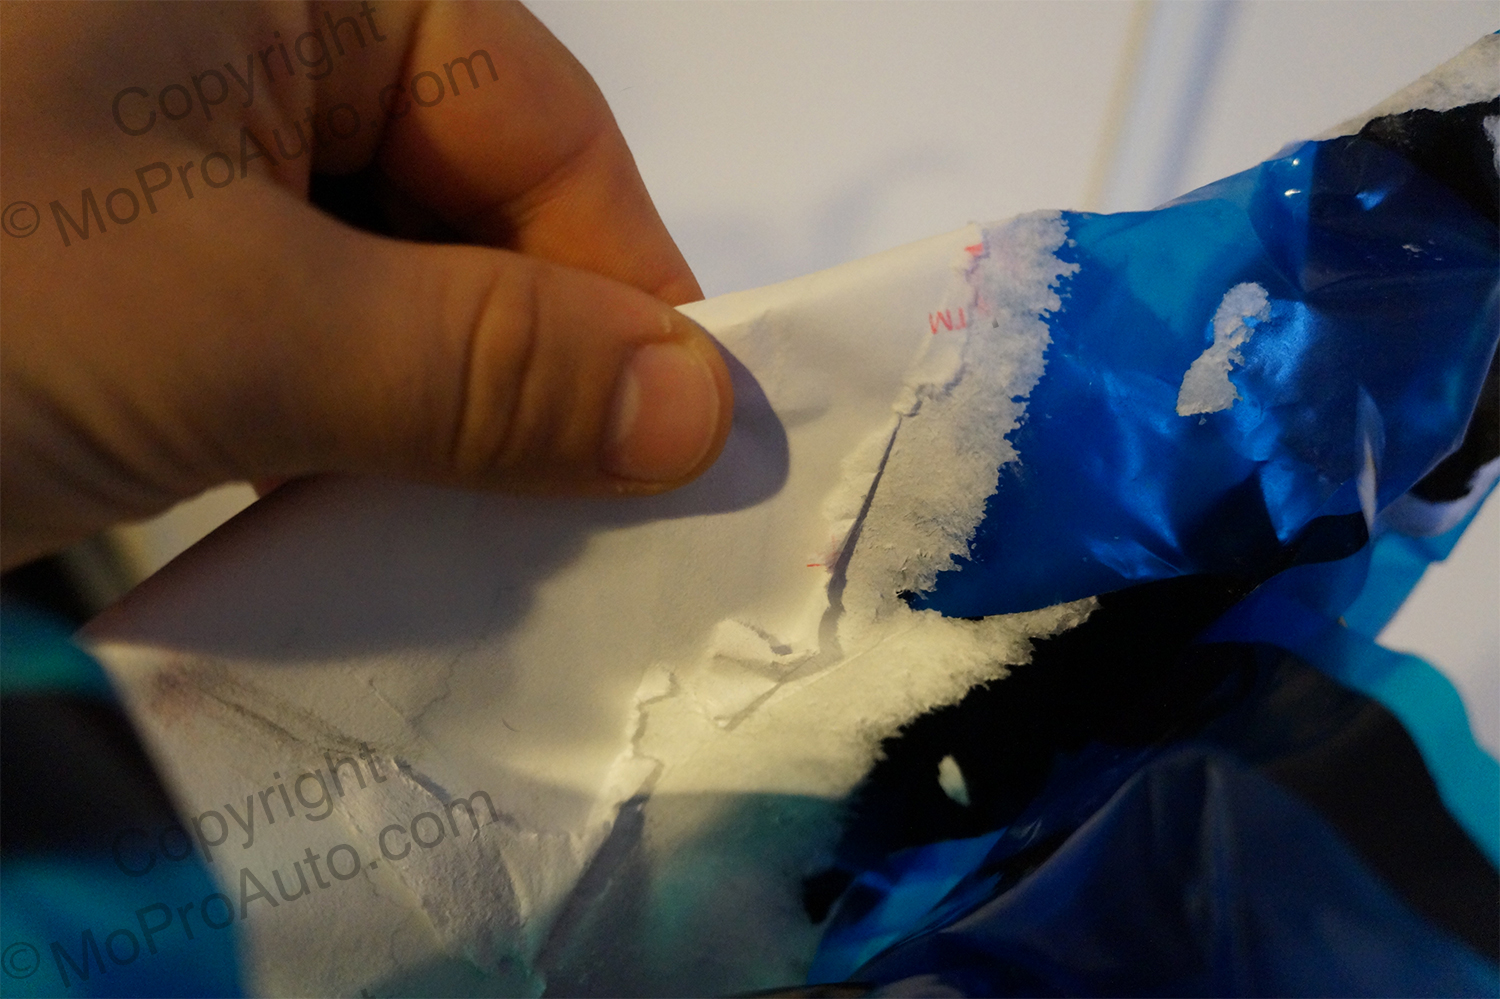
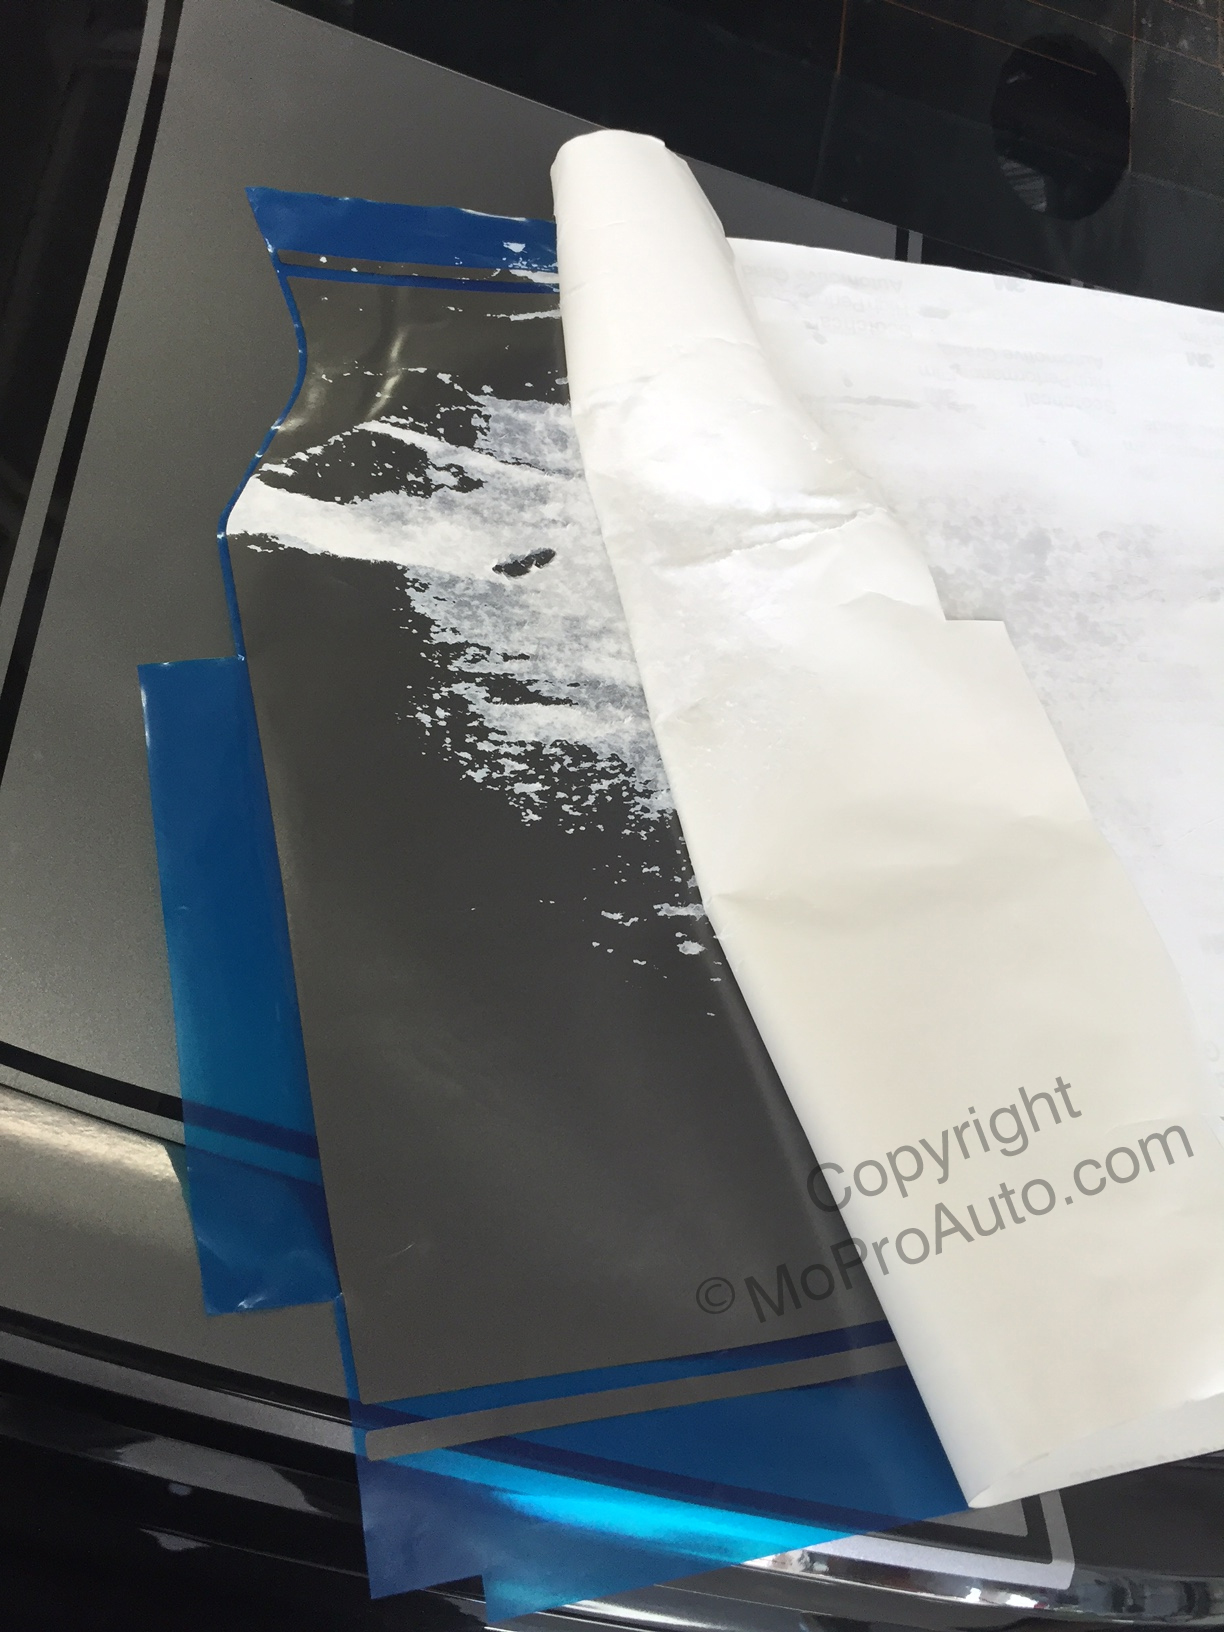
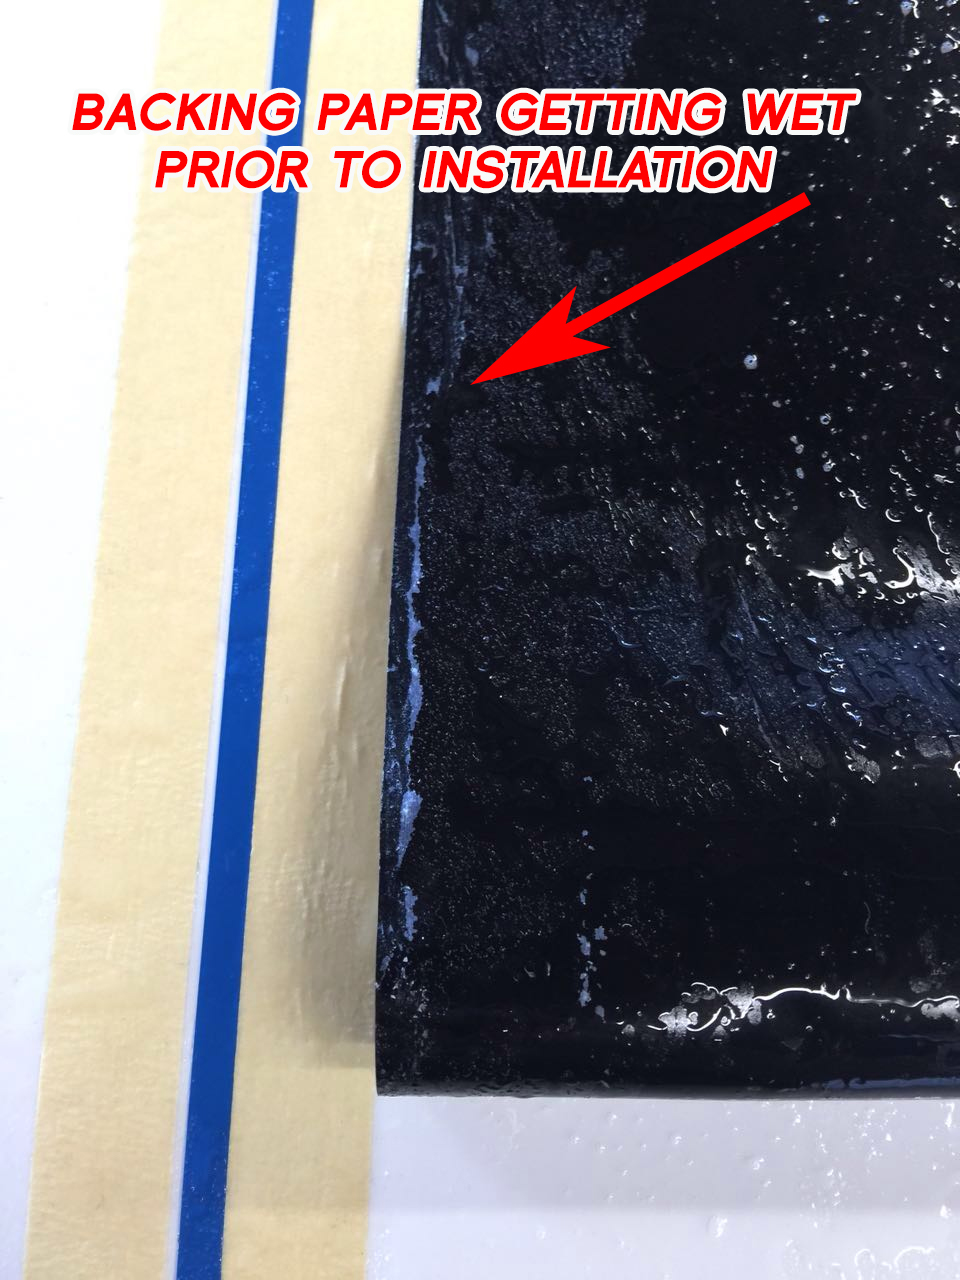
AVOID GETTING THE PAPER BACKING WET! : The paper backing getting wet during installation is the only reason the vinyl will "stick" to the paper. The “wet” method of installation should be used in most installations. However, the vinyl graphic is to be removed from the paper before installing and before getting wet! Again this issue is discussed in the "Vinyl Graphics Disclaimer" and also "General Installation Instructions" that is included with the order, and can be found at this link : https://www.moproauto.com/vinyl-graphics-disclaimer/ https://www.moproauto.com/moproauto-general-installation-instructions/ One trick that professionals use when this happens is to soak the pieces stuck to the vinyl with soapy water and try to gently scrape the paper from the vinyl, and the graphic can still be used. However we do not guarantee this will work. Avoiding moisture contact with the paper backing is your best option. Below are pictures showing what the vinyl can look like when the paper backing gets wet : EXAMPLES OF CUSTOMER SUBMITTED PICTURES / COMPLAINTS OF PAPER STICKING TO VINYL / RESPONSIBILITY OF INSTALLER TO AVOID THESE ISSUES!
|
|
AVOID WETTING |
AVOID WETTING |
AVOID WETTING |
AVOID WETTING |
AVOID WETTING |
|
AVOID WETTING |
AVOID WETTING |
AVOID WETTING |

If you feel there is still a problem, BEFORE INSTALLATION please email a minimum of three (3) pictures along with details of your order : CONTACT US!
SIZING OF "VEHICLE SPECIFIC KIT" IS WRONG |
|
INFORMATION ABOUT "VEHICLE SPECIFIC KITS": Most of our "Vehicle Specific" kits are 2mil thick and the same quality and thickness that conforms and surpasses OEM standards. It is designed to exact OEM standards in sizing, and should be installed in the same manner as OEM kits. Also keep in mind that many kits are designed NOT to go past the seams, due to the tendency of vinyl to lift when wrapped around seams. These are to be installed the same as OEM factory kits, and should be "dry" fitted before installation for proper fitment. It is solely the installers responsibility to see to the correct fitment of this product before installation begins. CUSTOMER IS RESPONSIBLE FOR CHOOSING THE CORRECT OPTIONS INCLUDING MAKE/MODEL/YEAR AT CHECKOUT : Great care and effort is put into the measuring of our “vehicle specific” kits. Each kit is designed, test fitted, and installed on factory vehicles before offered for sale to the public. Please “dry fit” the graphic before installation to make sure of proper fitment, because in most cases fitment is exact for the make/model/year purchased. If you feel there is still a problem, BEFORE INSTALLATION please email a minimum of three (3) pictures along with details of your order : CONTACT US! |
VINYL THICKNESS and QUALITY, or "I THINK VINYL IS TOO THIN", or "Is this CAST or CALENDARED film?" |
|
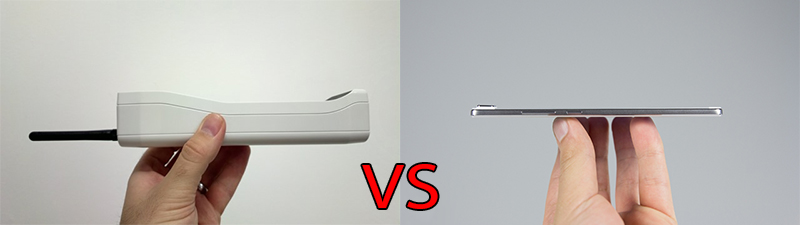
INFORMATION ABOUT "VINYL THICKNESS"
WHAT DOES PHONE THICKNESS HAVE TO DO WITH VINYL GRAPHICS? Here are the benefits of using today's modern 2 mil cast vinyl thickness: One long time professional installer wrote us about the thickness of the vinyl we use saying : Professionals recommend 2 mil vinyl thickness for modern automotive applications. If for some reason you still feel there is a problem with the thickness of the vinyl you received, BEFORE INSTALLATION please email a minimum of three (3) pictures along with details of your order : CONTACT US!
ADDITIONAL INFORMATION ON VINYL THICKNESS, DURABILITY, QUALITY, and CAST VS. CALENDARED FILMS Durability - How Long does Vinyl Last? MOPROAUTO ONLY USES PROFESSIONAL GRADE
|
ADHESION PROBLEMS - "VINYL IS NOT STICKING" or "VINYL PEELING" |
||||||
|
WHY IS THE VINYL NOT STICKING? This is a common question that is easily prevented. All “vinyl not sticking” problems are because the vehicle was not properly cleaned and prepped. The installation instructions mention using Naphtha Cleaner or isopropyl alcohol to remove all dirt, grease, silicone, wax, etc. from the surface before installation. If you clean it once or twice and think that's "good enough", then that is not the case. Your finger must be able to "drag" across the surface of the paint. If it "slides", then wax or silicone still remain and there is no way the vinyl will stick long term. The surface must be completely cleaned and prepped for proper adhesion. Please read the installation instructions for details. Also, if weeks or months go by and then the vinyl starts to peel, it is the same issue. Proper prepping is essential for the long-term life of the vinyl! ADHESION PROBLEMS ARE THE RESULT OF POOR PREPPING BEFORE INSTALLATION
|
|
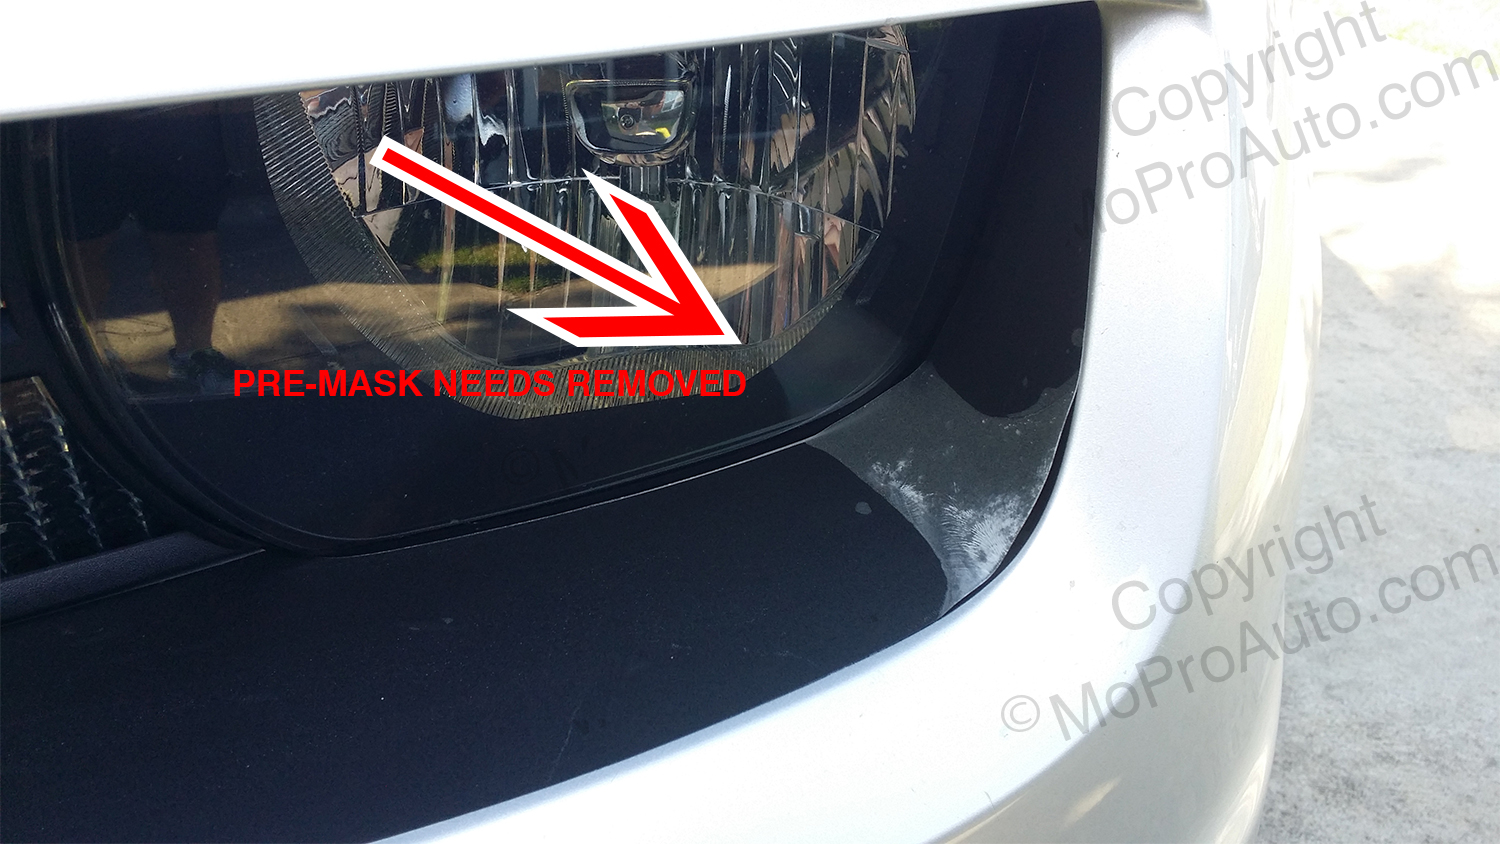
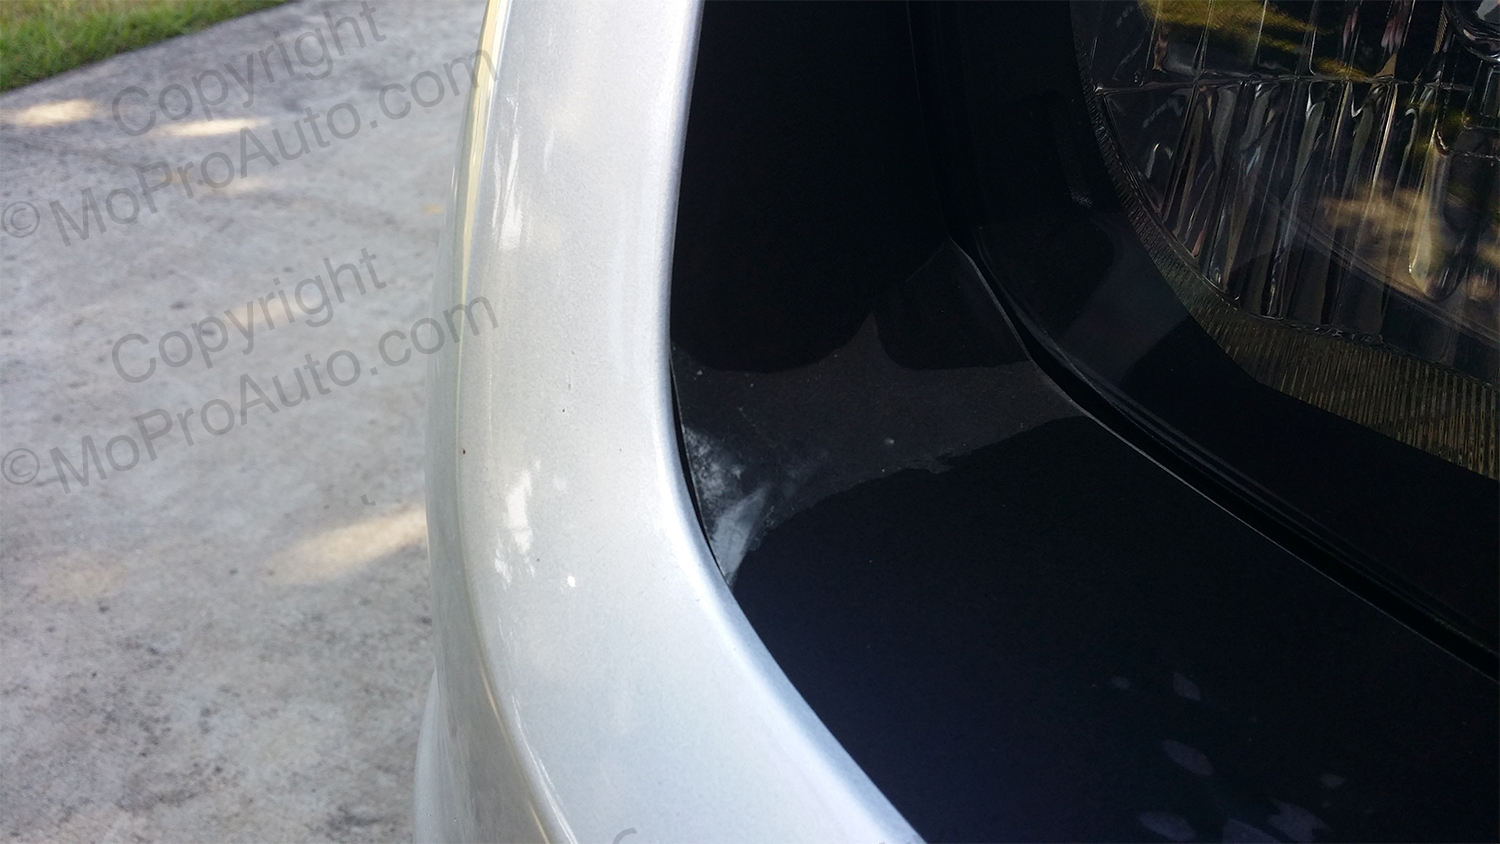
CLEAR PRE-MASK NEEDS REMOVED! |
CLEAR PRE-MASK NEEDS REMOVED! |
CLEAR PRE-MASK NEEDS REMOVED! |

|
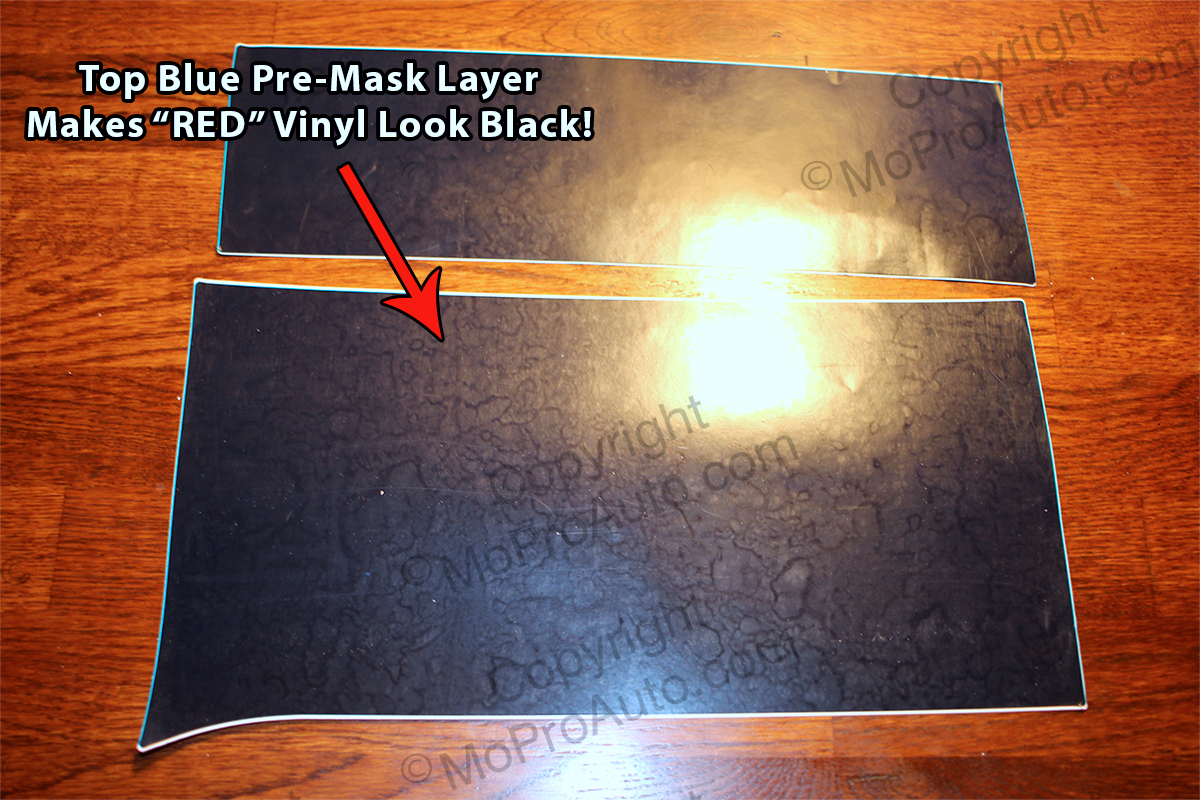
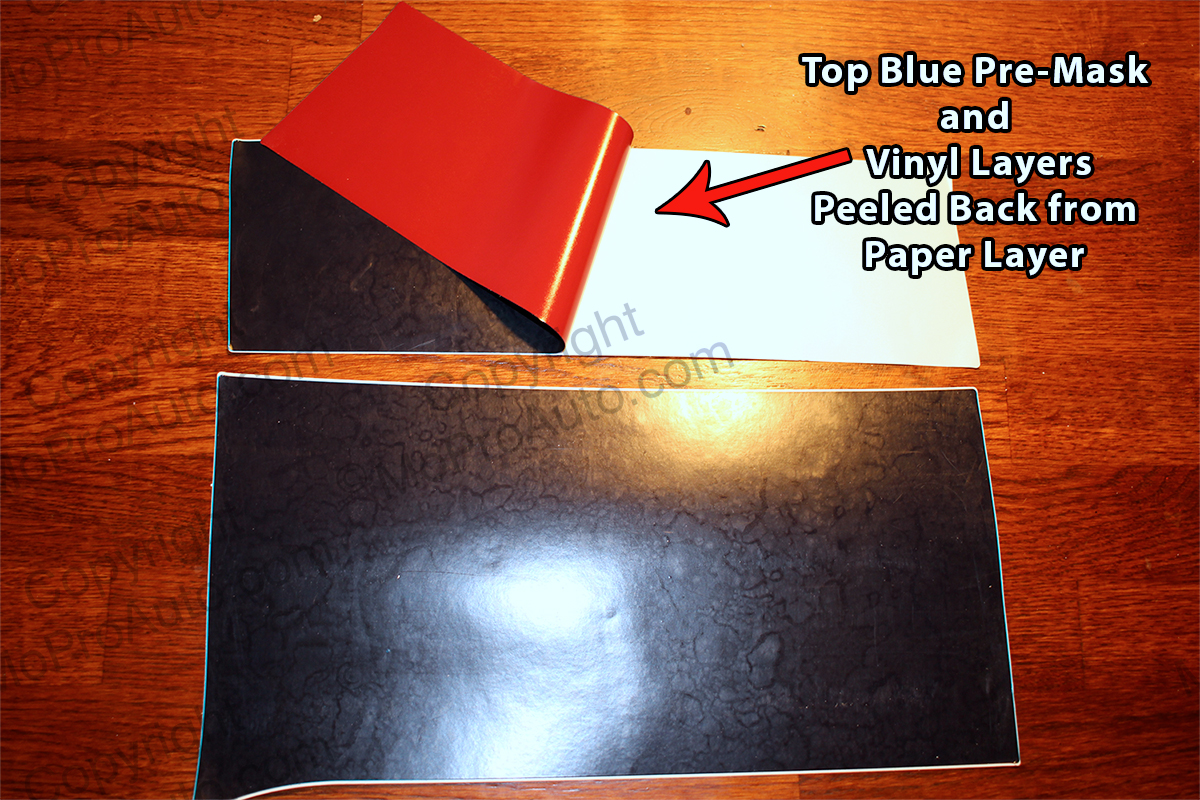
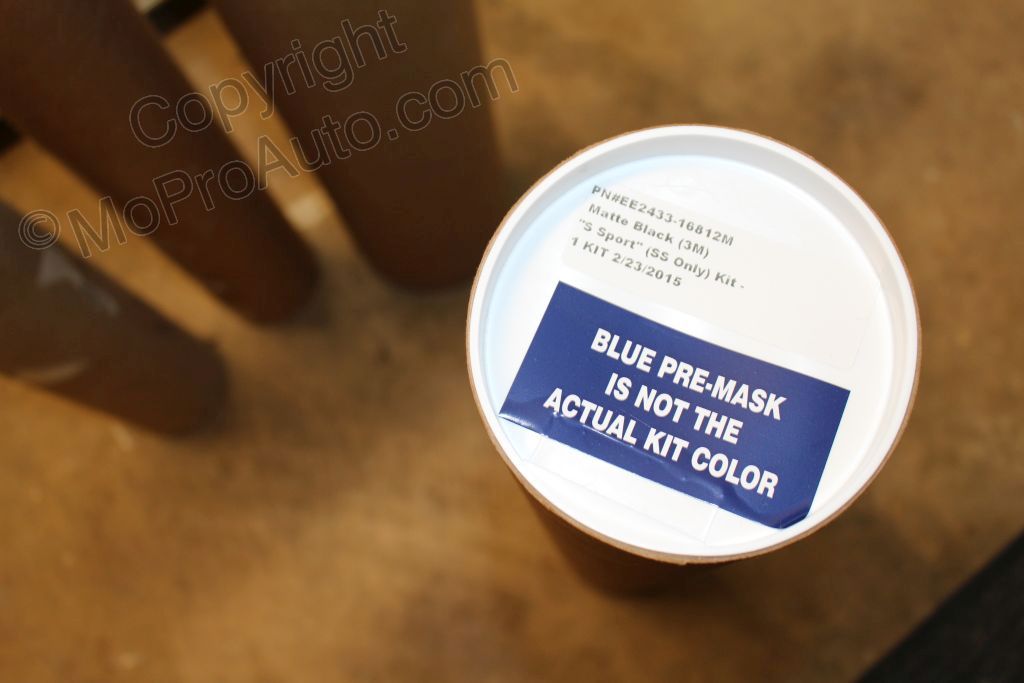
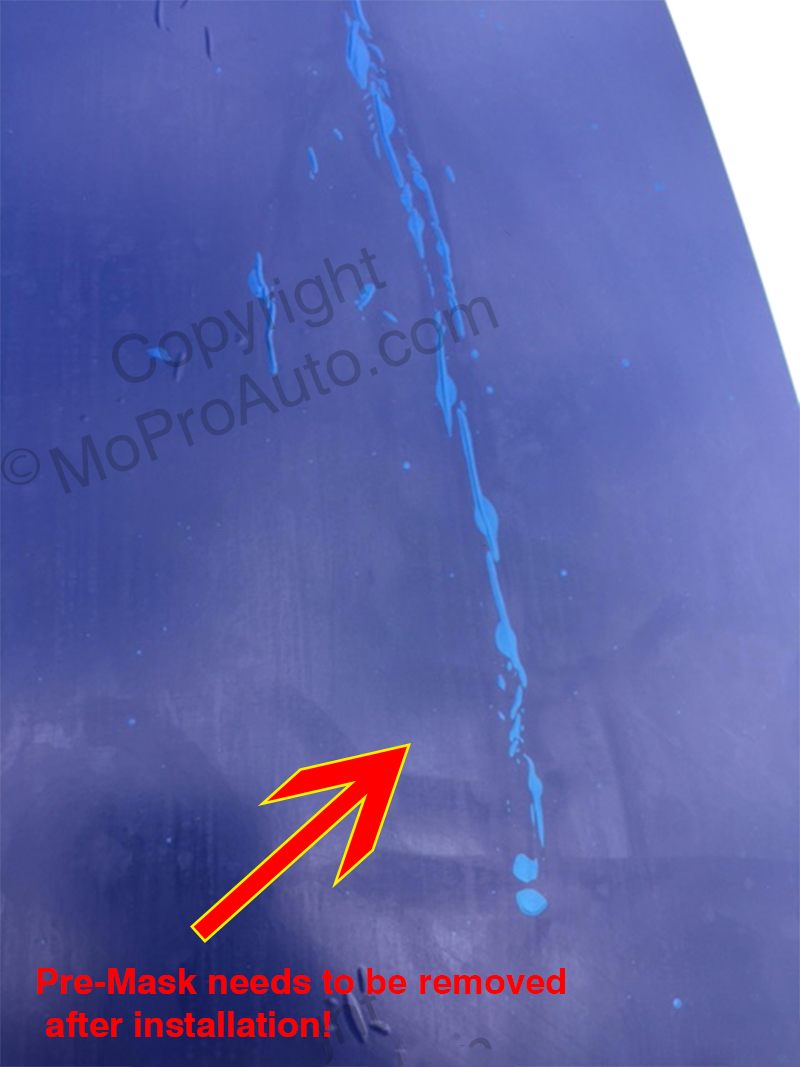
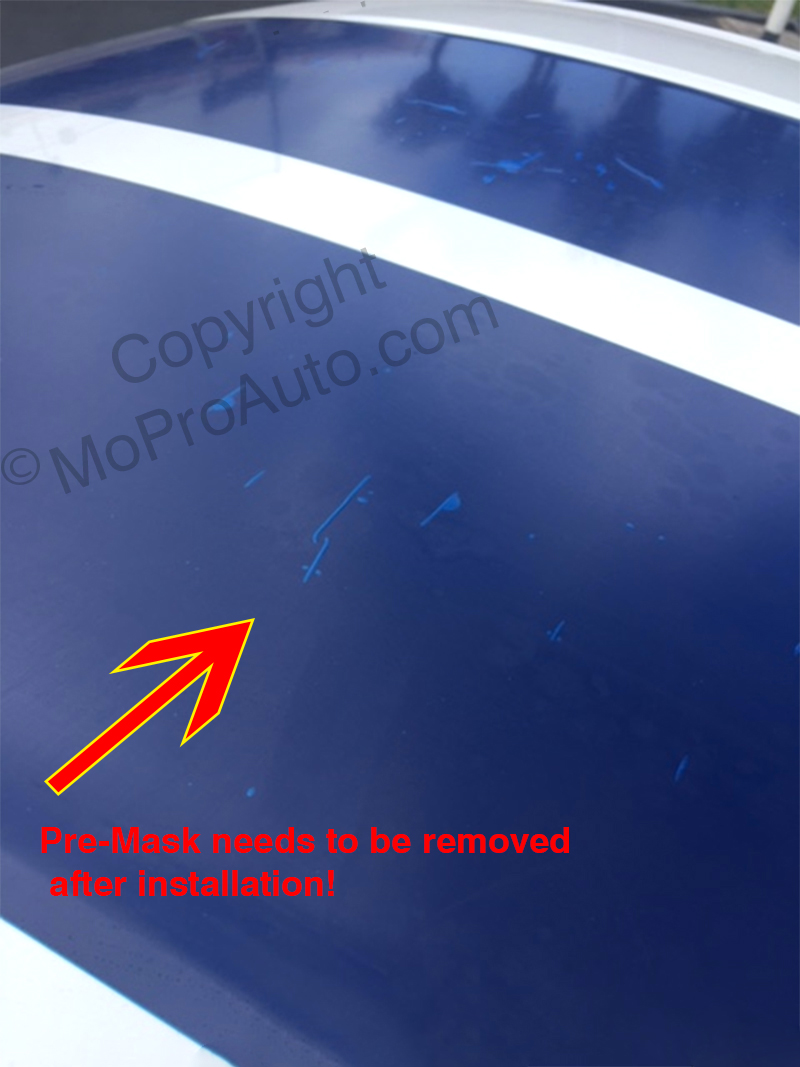
BLUE PRE-MASK NEEDS REMOVED! |
BLUE PRE-MASK NEEDS REMOVED! |
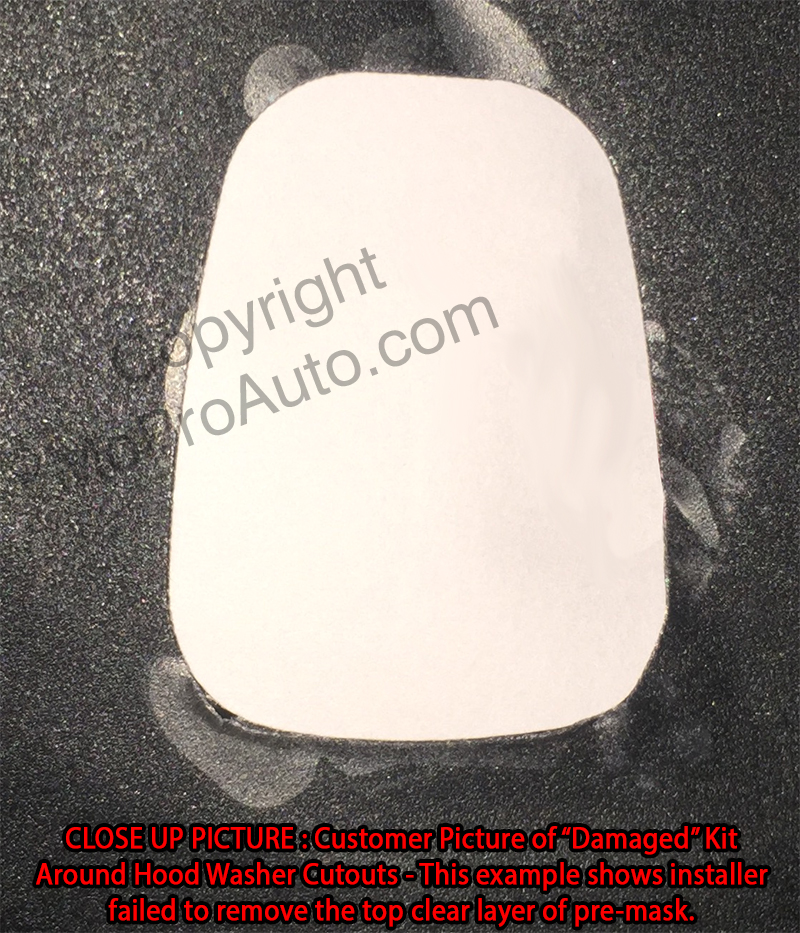
CLOSE-UP : CLEAR PRE-MASK NEEDS REMOVED! |
3RD PARTY INSTALLER WAS USED (BODY SHOP, TINT SHOP, ETC.) or "MY INSTALLER SAYS THERE WAS A PROBLEM" |
|
| * IMPORTANT * | EXAMINE VINYL FOR “DAMAGE” BEFORE INSTALLATION BEGINS! These vinyl graphics are carefully produced and packaged, and our Pre-Shipment Inspection catches any flaws in the vinyl before the package is shipped. It is EXTREMELY RARE for the vinyl to have defects, flaws, or damage prior to opening and unrolling the kit for installation. If using a 3rd party installer, please OPEN THE PACKAGE WITH THE INSTALLER and examine the vinyl graphic prior to installation to CONFIRM THERE IS NO DAMAGE NOR MISSING PIECES OR SECTIONS of the vinyl graphic kit, so no misunderstandings occur after installation. Once installation begins, at that point the installer is responsible to properly install the vinyl graphic on your vehicle and to avoid any issues which include but are not limited to : bubbles, wrinkles, stretched or torn vinyl, adhesion problems, sizing problems, etc. This is very important, because it has been our experience that some installers will not take responsibility for their mistakes. Many are quick to "blame" the vinyl, especially if their installation skills are lacking and they do not want to pay for the replacement of a vinyl graphic. We also attribute "missing" pieces of our kits to installers that mess up certain sections during an install. While this is not an industry wide problem, it happens enough that we need to mention it to our customers, and is the reason why it is best to examine the vinyl with the installer to avoid any "misunderstandings". WHEN INSTALLER SAYS, "YOU RECEIVED WRONG COLOR, or VINYL HAS SPOTS AND IS DEFECTIVE - This can be a good indication that the installer is not familiar with how top layer pre-masking looks, and is not aware of how modern vinyl graphics are manufactured or installed. Please see this link for more information : | * IMPORTANT * | AVOID BODY SHOPS AND TINT SHOPS FOR INSTALLATION! Please be advised that BODY SHOPS AND/OR TINT SHOPS SHOULD NOT be used for vinyl graphics installation! Using these establishments to install will void any warranty with the vinyl graphic kits, and we cannot be held accountable for any issues that may arise during installation due to installer neglect. Please find a 3M certified installer in your area to receive a professional installation. We would also recommend avoiding auto dealerships for installation, because in many cases they will sub the work out to their body shop or local tint shop. While we respect the work of these businesses, in many cases they are not qualified for professional vinyl graphics installation unless they hire trained, qualified 3M Professional Installers with experience installing modern vinyl applications. Check this link for 3M Preferred Graphics Installer in your area : If you feel there is still a problem that we can solve after using one of these establishments, and you examined the vinyl BEFORE INSTALLATION and found NO DAMAGE, yet the installer says there is a legitimate problem with the installation which is the fault of the vinyl, then please email a minimum of three (3) pictures along with details of your order : CONTACT US! |
SPOTTING or DARK SPOTS ON VINYL MONTHS AFTER INSTALLATION |
||||
|
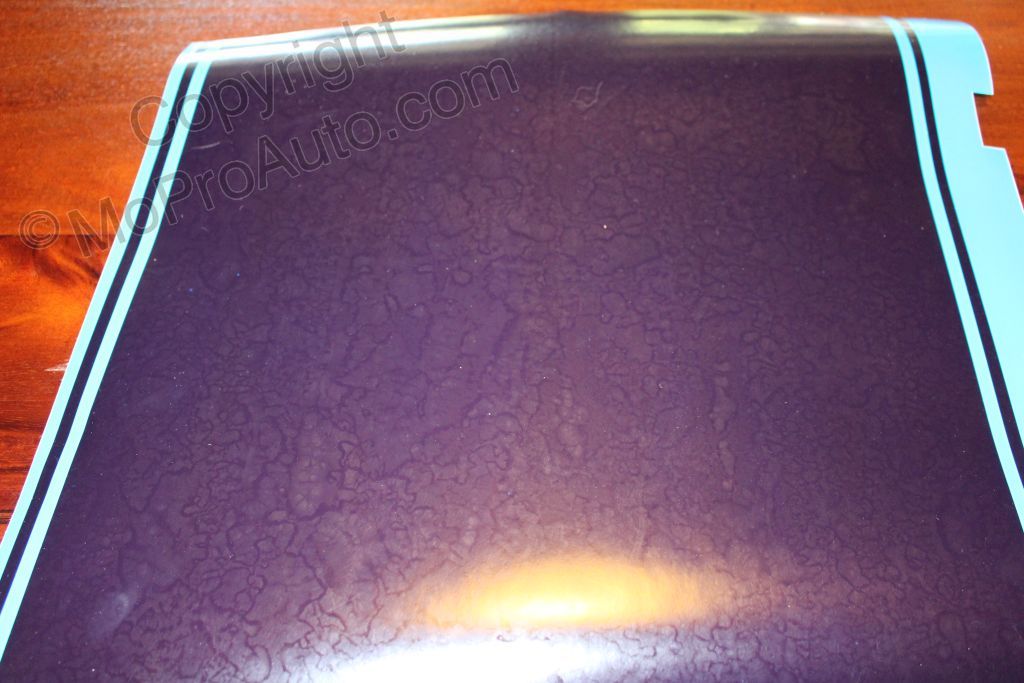
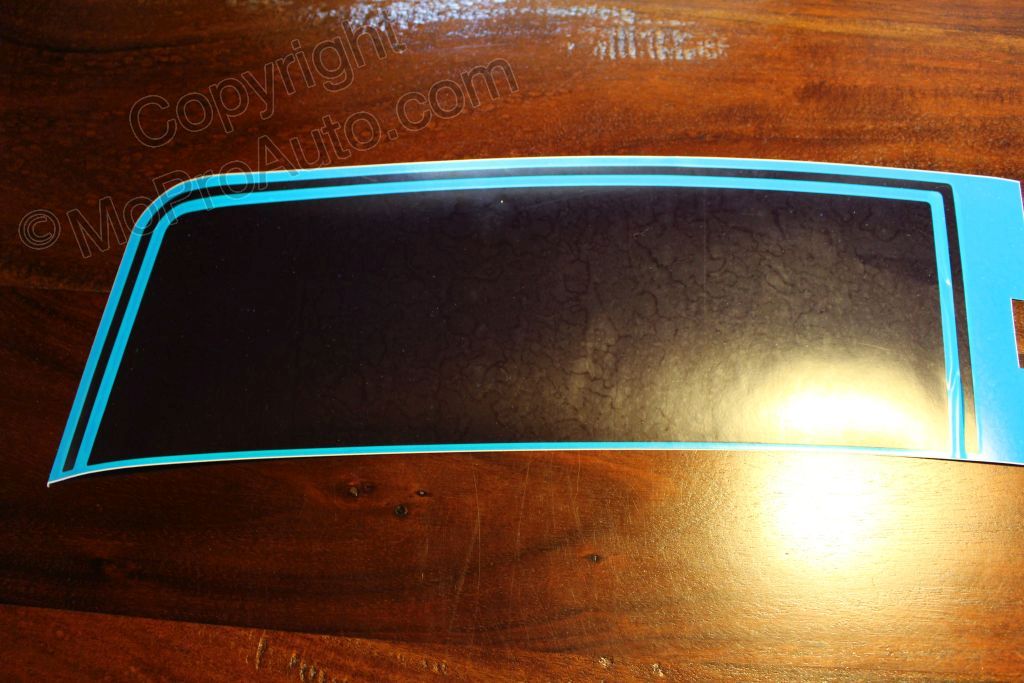
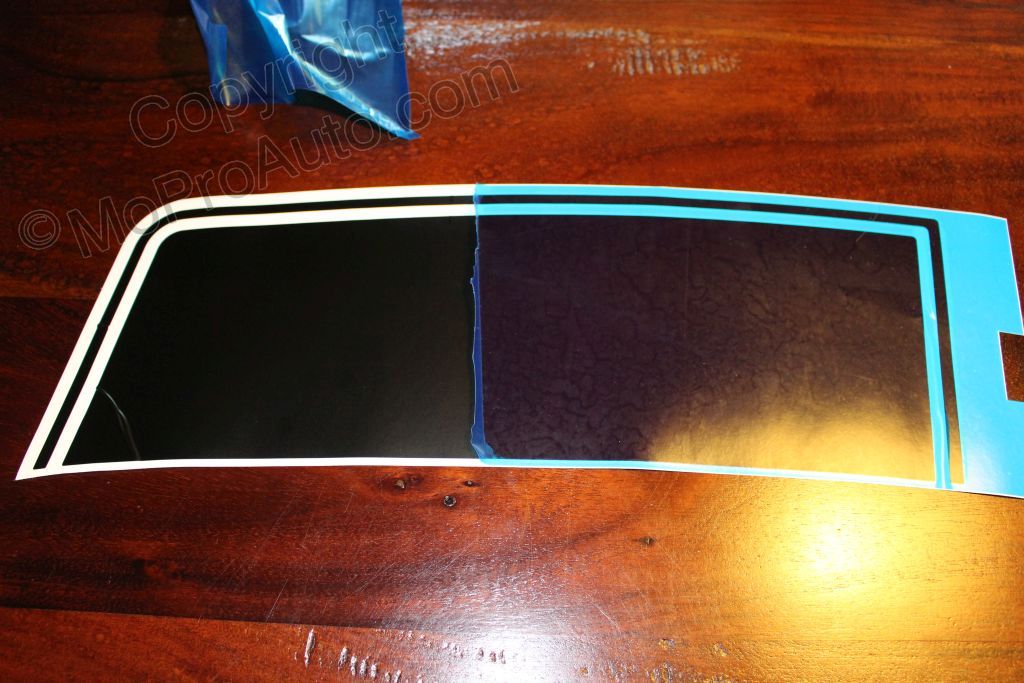
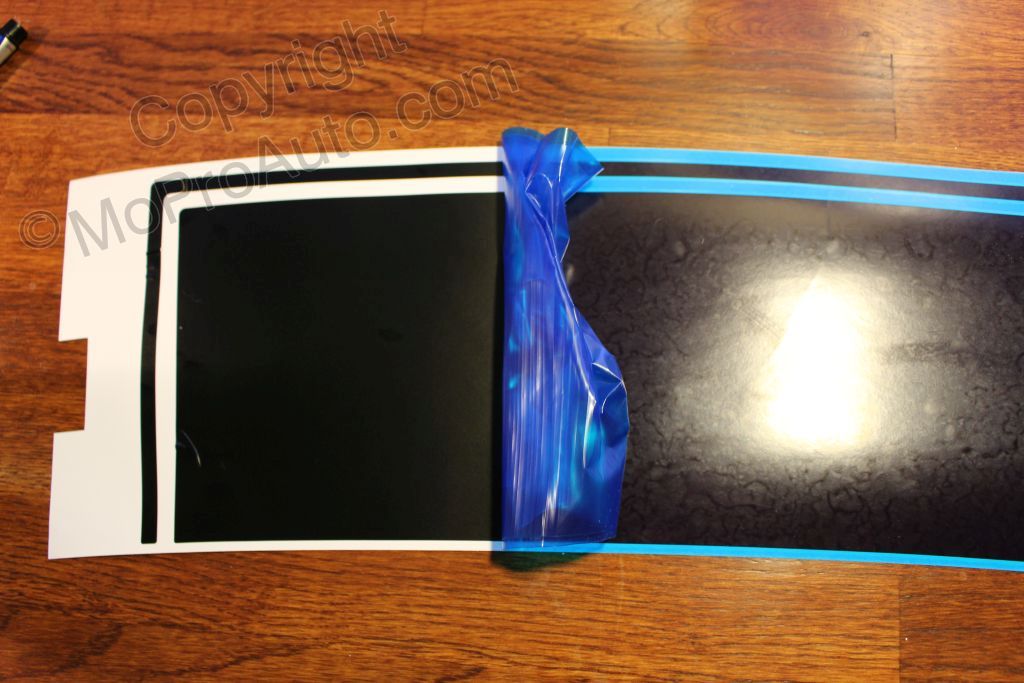
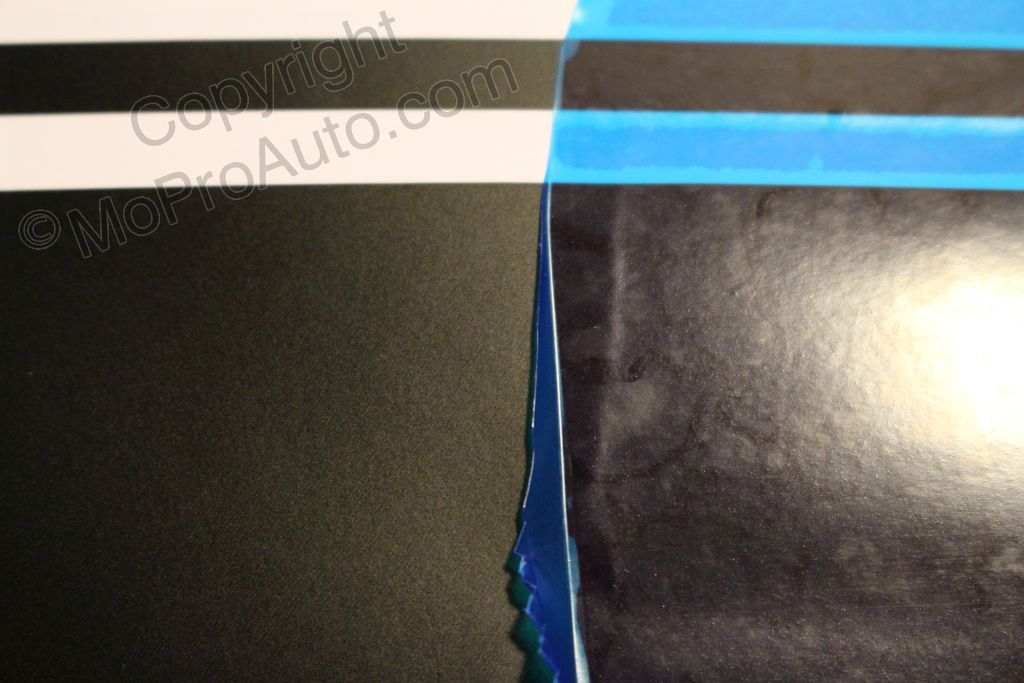
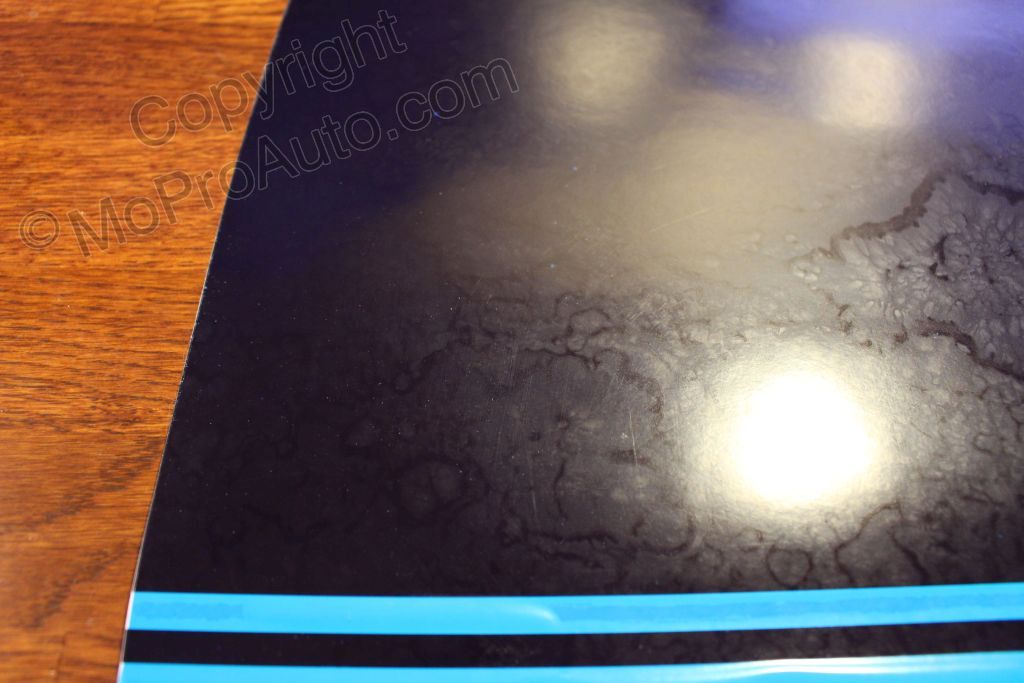
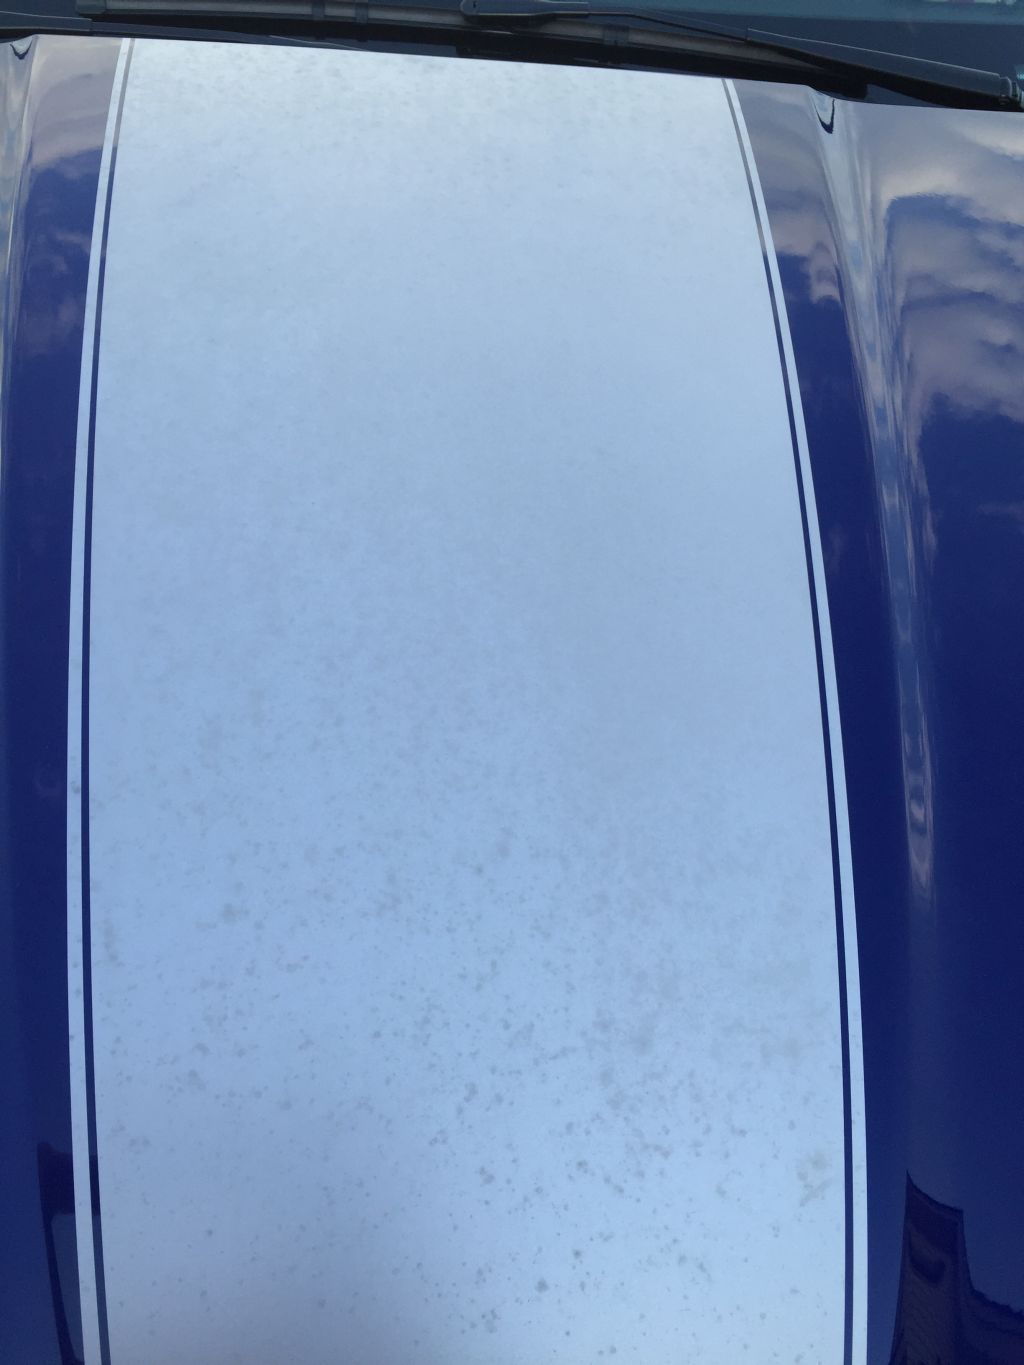
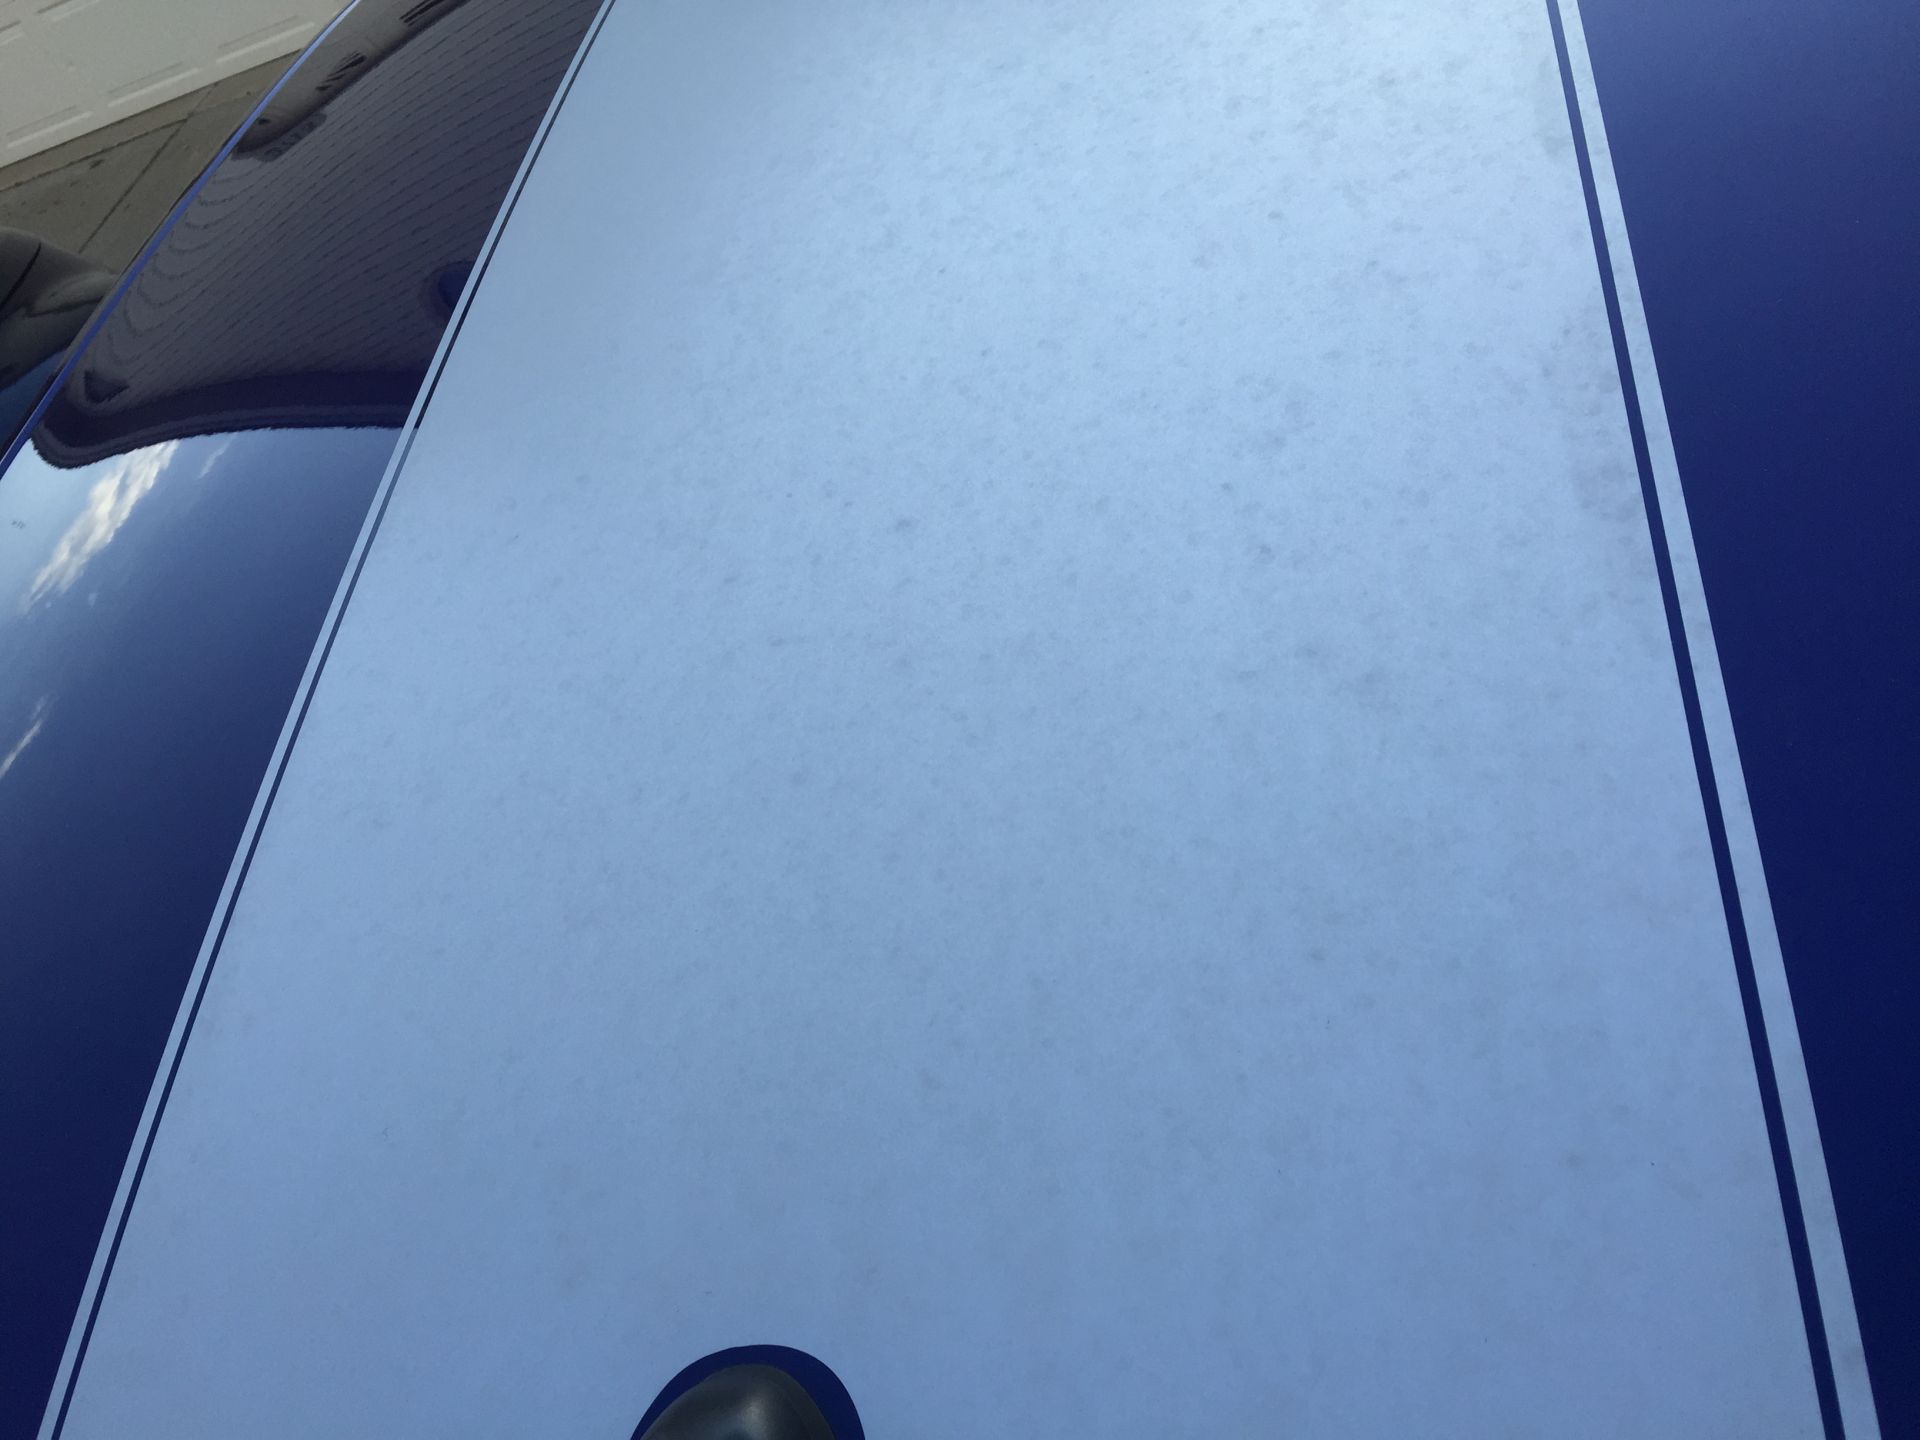
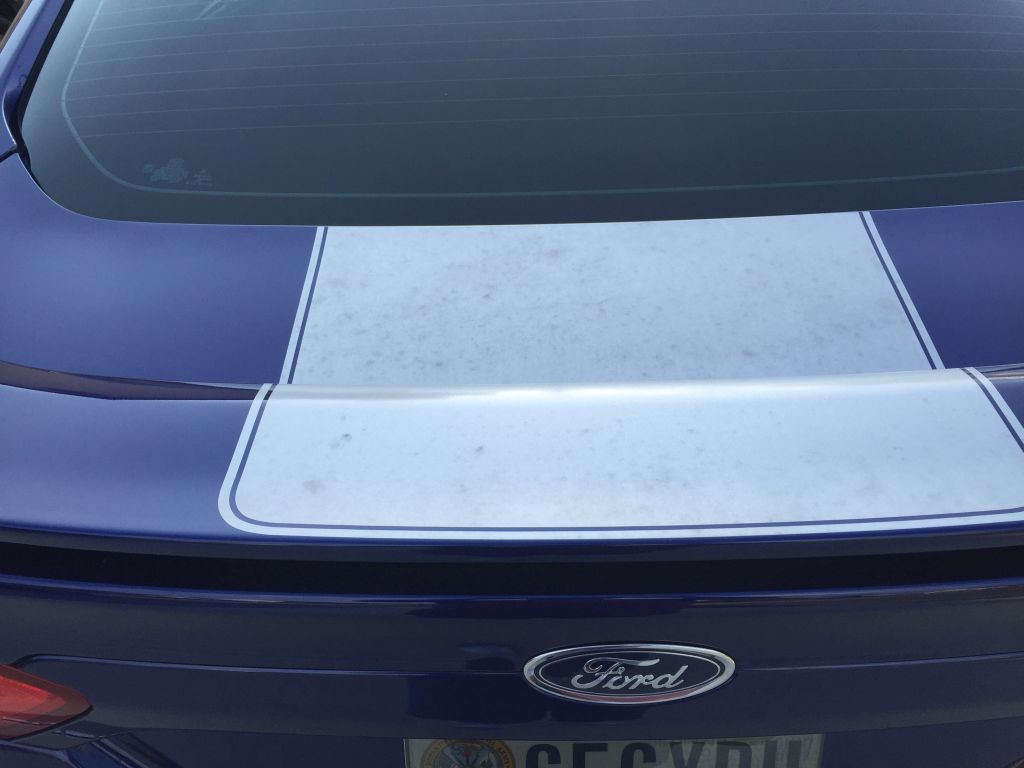
INFORMATION ON ENVIROMENTAL CONDITIONS: These pictures show the results of “acid rain” and the effects petroleum based products (such as certain waxes) have on vinyl graphics.
Practical Information: Dealing with "Acid Fallout" and use of "Petroleum" Based Cleaners and Waxes : Some number of automotive vinyl graphic customers located in various industrialized areas have experienced a dull rust-colored surface condition sometimes known as “acid fallout”. This has occurred to OEM paint finishes, however vinyl wrapped vehicles are more susceptible and is a common issue with vinyl. The likely cause is an environmental problem associated with fossil fuel burning facilities in various locations in the USA…a condition that is especially problematic in low-lying valleys and other areas where the pollutants often become concentrated in stagnant air. These pollutants, most likely sulfur dioxide, bond with water vapor, forming an acidic molecule. When the dew point is reached in the area, dew is deposited on the vehicle surfaces. What was acidic vapor is now acidic dew. The acidic dew etches the surface of the PVC vinyl film if the dew is left on the vehicle for prolonged periods of time. Because it is dew, and not actually rain, the acid is fairly concentrated and begins to etch into the surface of the laminate. Once the dew has evaporated from the vehicle, the dew leaves deposits of dust, minerals etc. from the water vapor in the etched surface of the vinyl, thus causing a rust or dulled spotted colored appearance depending on the color of the vinyl. The acid continues to erode the laminate creating a pock-marked surface which further exacerbates the problem by increasing the surface area for the acid to collect and erode and increases the dust and mineral deposits. Vinyl Care Suggestions : Horizontal applications of vinyl do not carry a warranty, as stated at this link : * Because of the extreme conditions (sun exposure, harsh weather conditions, acid rain fallout, tree sap, bird dropping, etc.) encountered for horizontal (hood, roof, trunk, etc.) vinyl applications, any type of horizontal applications (racing stripes, hood stripes, etc.) are not covered under any type of warranty, unless otherwise specified in each individual listing. Please contact us before purchasing with any questions regarding the warranty on any one item. Time values given by the manufacturer of the vinyl we use (3M, Avery, Oracle, Ritrama) are an estimate only. Under “ideal” circumstances, vinyl will last upwards of 8 years or longer on a vehicle (such as a show car that is not a daily driver and not exposed to the elements). Because of the above environmental considerations, these vinyl manufacturers do not warranty any type of horizontal application. |
HELP! TRIED TO CANCEL ORDER, IT SHIPPED ANYWAY! |
|
PRODUCTION PROCEDURES TO ENSURE FAST SHIPMENT : Our customers LOVE to receive the item purchased as quickly as possible. That is why in most cases orders we receive go straight to our Production Department, and depending on the time of day go straight into production. These orders quickly get cut, rolled, and packaged for shipping, many within just a few hours. If we receive a cancellation request before an item goes into production, we do our best to stop the order from shipping. However, some orders ship extremely fast and we are not able to accomodate cancellation requests if the order has gone into production, has been staged for shipping, and/or has already shipped. At that point a "Return Request" will need to be processed through the link provided on our website. |
|
Any other questions, comments or concerns?